


Creating art using AI needn’t lack creativity or diminish core art skills. There’s a way to enable AI to develop your digital art live, in real time, as you draw and paint. In this tutorial I explore how to create environment art use of Photoshop and Krea AI with Screen2image.
Anyone who’s used text-to-image AI art generators knows that you can certainly get a pretty picture of AI image generation, but it very rarely looks anything like the image you had in mind before typing your prompt. This is very unlike what we’re used to in most of our more traditional workflows.
01. Linking Krea and Photoshop
(Image: © Future / Martin Nebelong)
Go to Krea.ai and make an account. Once setup, open the Real-time Generation tab. Open a new document in Photoshop. It’s ideal to have a two-monitor setup here, so you can keep Krea on one screen and Photoshop on the other. (Read our guide to the best monitors for graphic artists if you need a second screen.)
In Krea, select the Screen2Image function and select your Photoshop window. This will drop your screen in the Krea input area, and you can now scale it up to show your Photoshop painting area.
02. Dialling in the AI amount
(Image: © Future / Martin Nebelong)
Start by dialling down the AI strength setting in Krea. By default I find it’s quite high, and we want it as low as possible without losing the benefit of the AI transformation. The aim is to enhance your art not replace you. I use a cut-and-paste approach to get the elements I like from the AI generator into my Photoshop document. (We have a hub of Photoshop tutorials to follow if you need more help with Adobe’s software.)
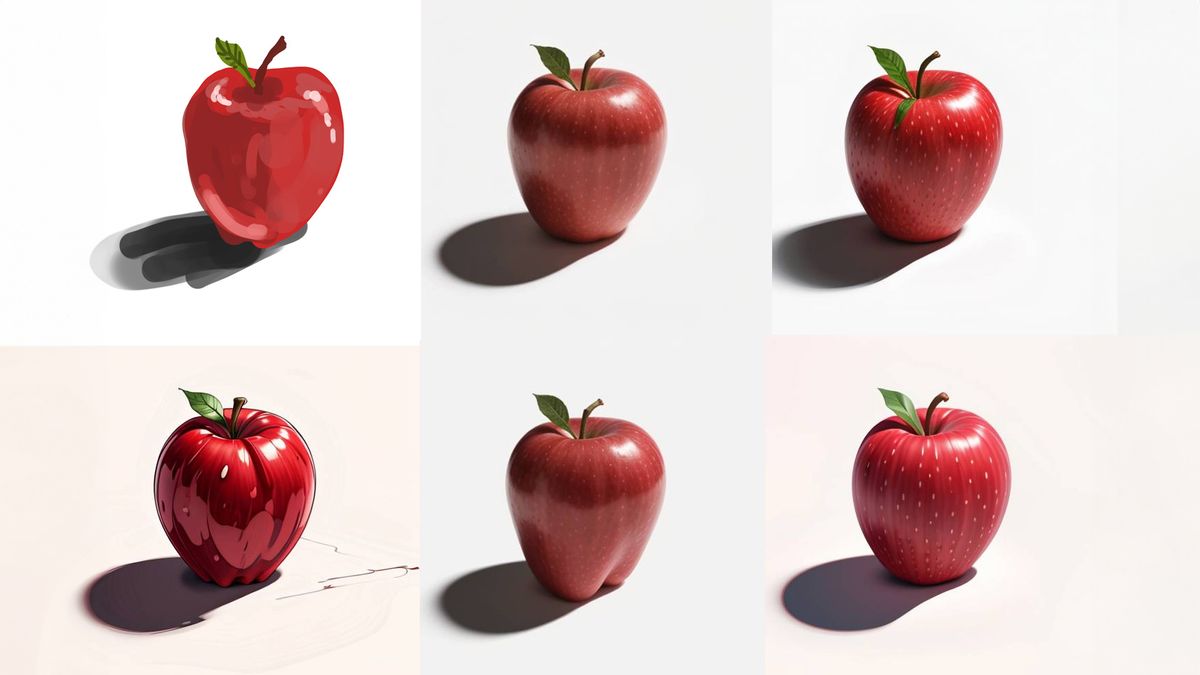
Krea has several different AI models to choose from, from more realistic generations to a cartoon style and a kind of concept art or game art look. I find that Krea works best for realistic work, as stylised work feels too much like the same generic AI style of other AI models, and I’d like to be able to define something more original myself. Within the very near future, I’m sure these AI models will be able to update as you paint and define a new style for it to follow.
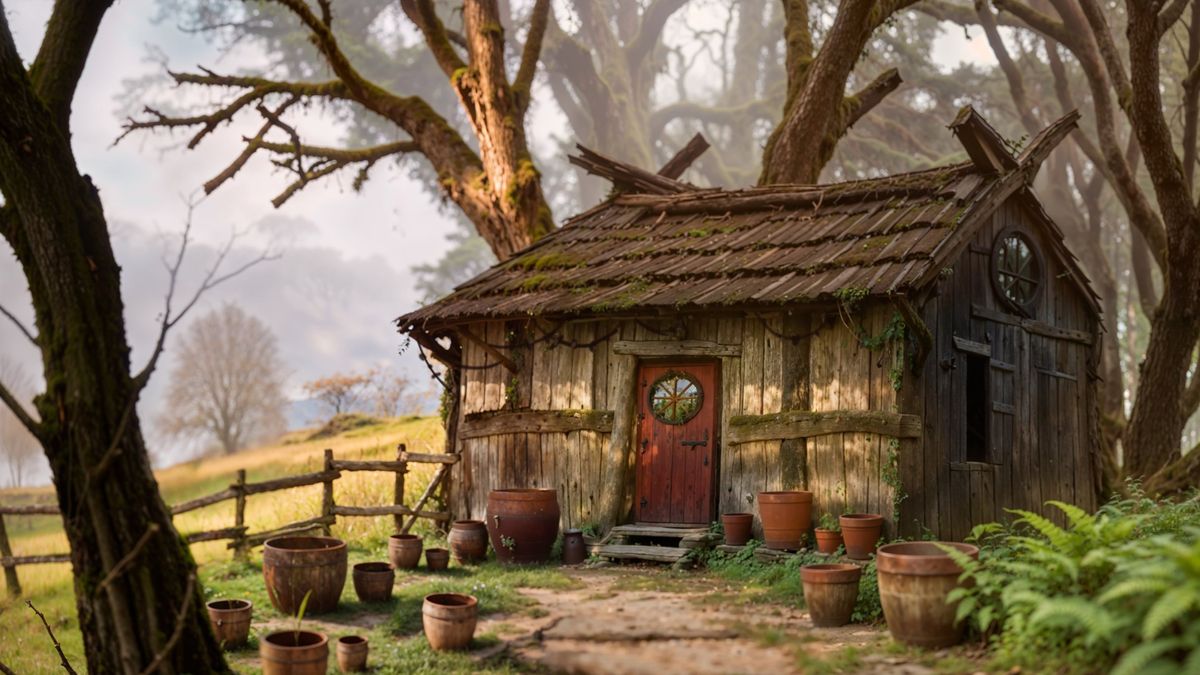
03. Let’s get p(ai)nting!
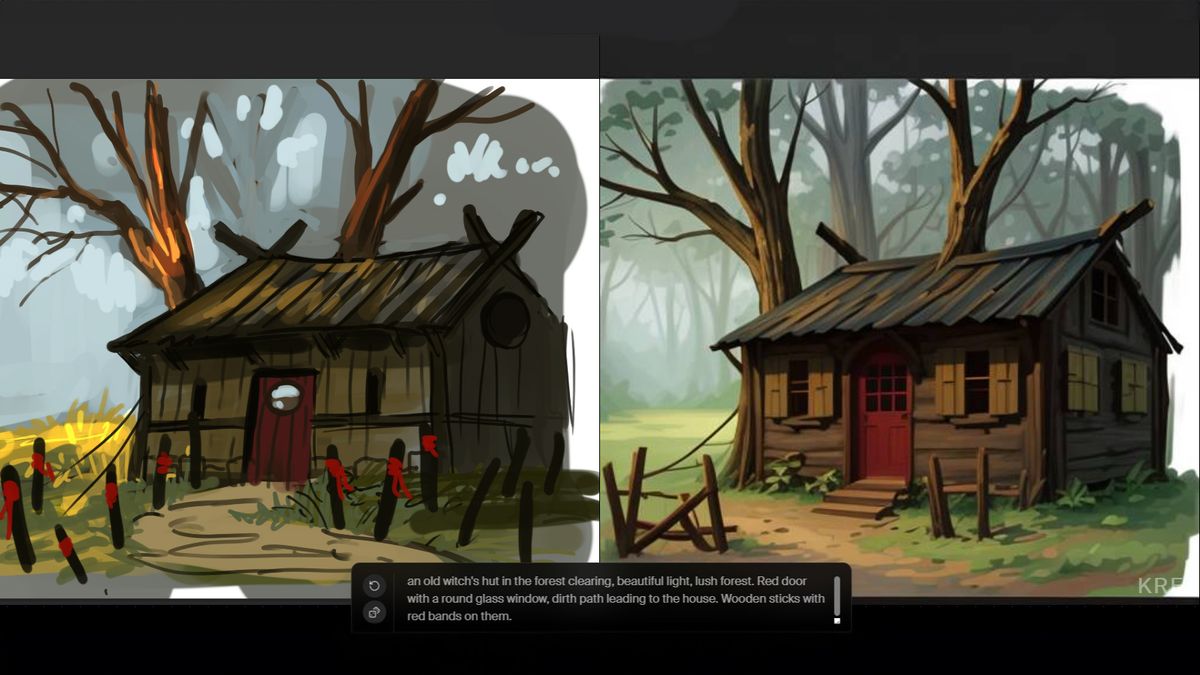
(Image: © Future / Martin Nebelong)
I begin by painting in the rough shapes of the scene I want to create – in this case, an old witch’s hut in a lush forest. I’ll eventually go for a semi-realistic look, but to start with, it’s okay to keep things more abstract and allow the AI layer to ‘hallucinate’ more of the scene into existence.
For this step, you’ll use all your art fundamentals, to build an interesting image. The core art skills that make you an artist are needed to enure the foundation of the image is good, so composition, colour theory, knowledge of light and shadow, all come in handy here.
The goal is to use generative AI to create artwork that you control, not the AI, but with the benefit of having the AI fill in large areas of detail that you might not need so much tight control over.
04. Krea – Realtime transformation
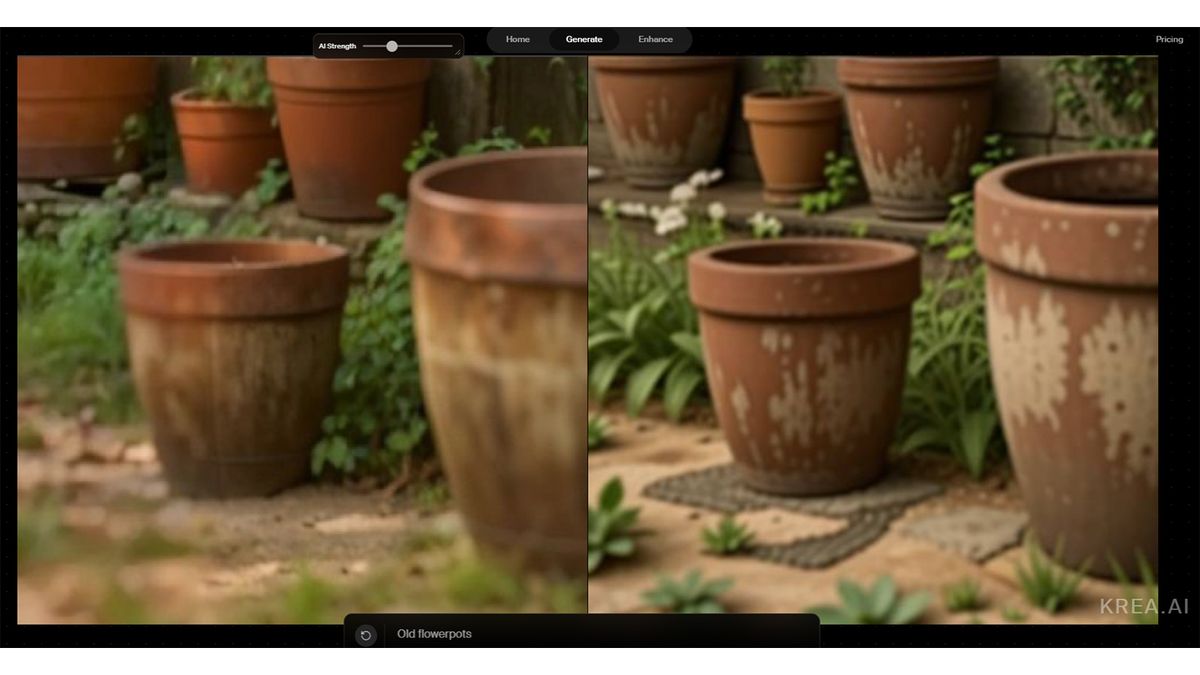
(Image: © Future / Martin Nebelong)
Notice how Krea now updates as you paint. But by default, the text prompt in Krea doesn’t reflect what you’re painting, so either leave the field empty and see if Krea can recognise the shapes you’re painting, or fill in a prompt to help the system on its way.
If your scene is very complex, you can zoom into certain areas of your painting to focus the AI’s attention on specific things, objects or areas of your painting. In my scene I use this to focus on a flowerpot, an element in the hut, or something else that needs extra focus. If you update the text prompts accordingly, you can get very specific and precise results just for these details.
05. Cut and paste!
(Image: © Future / Martin Nebelong)
As you work on the scene, you’ll notice that the AI process constantly fluctuates between different results, making it difficult to get exactly what you want in one fluctuation.
To avoid this, I can ‘lock’ elements down by copying and pasting them from the live AI flow, into my Photoshop image. Yoy can use PRT SCN or Print Screen button, or the Windows Clipping tool, to capture elements you like from Krea and paste them into your Photoshop scene. Almost like assembling a puzzle where your brushstrokes define the direction the image on the bricks is steered towards.
By combining the above workflow with standard digital painting techniques you can easily paint elements in your scene and then copy and paste more refined versions of them from Krea and back into Photoshop.
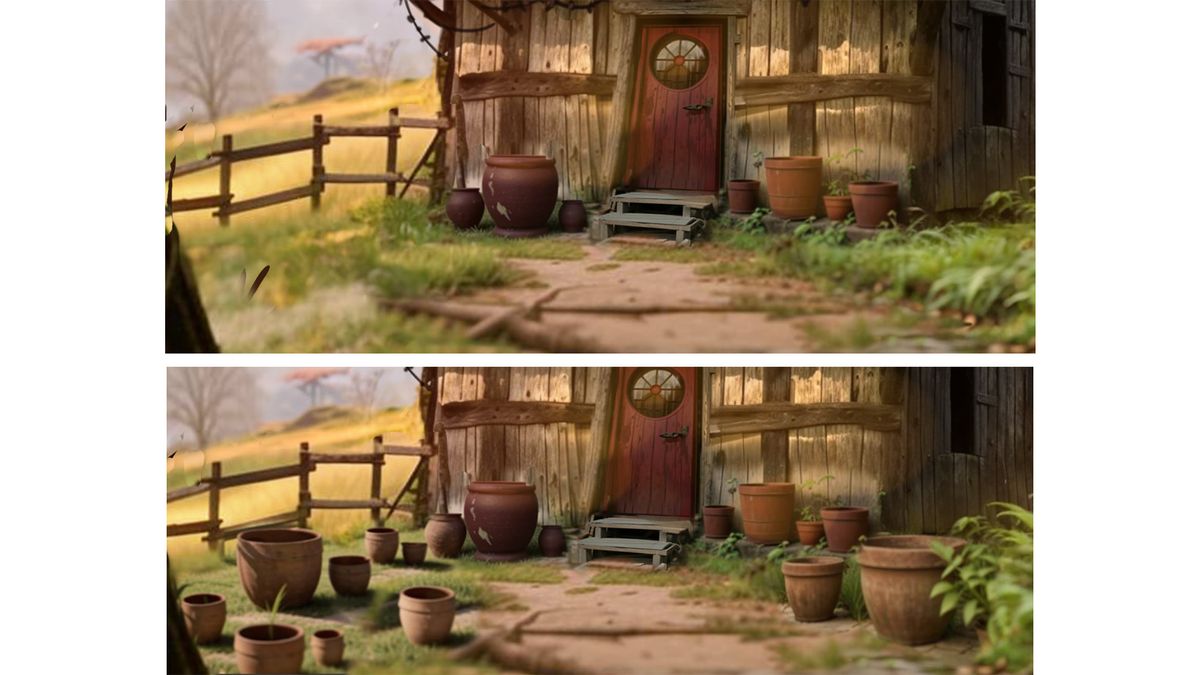
06. More definition and detail
(Image: © Future / Martin Nebelong)
In this step, you can use either Krea AI’s upscaling function or a service like Magnific ai to enhance and upscale your image, as the base Krea transformation is pretty low res.
Using these functions can also result in images where some elements work and others don’t. As in the previous steps, I use cut and paste to get the best elements into my scene. Finally, you can employ all your usual Photoshop painting and editing skills to take the image to a finished state. If you like, add a fitting character to the scene using Krea and painting to channel it into existence.
Using an approach like the one I’ve outlined here will give you much more control over the final image than simple text prompts could ever do. It’s a workflow that also requires skill and a knowledge of the core principles of digital art and traditional painting to achieve the best results.