


Tutorial videos are arguably one of the best ways to teach skills, whether it’s whipping up a delicious meal or mastering a new coding language. However, achieving clear narration can be quite a challenge without a natural-sounding voice. That’s where the AI voice generator in CapCut Desktop Video Editor comes in handy—it allows you to transform your written instructions into professional-quality voiceovers. This tutorial will walk you through how to use this voice generation feature to create engaging tutorials that inspire viewers to take action. With the right tools, sharing information becomes not only easy but also exciting!
Article continues below advertisement
The Impact of AI Voice Generators on Tutorials
The CapCut Desktop Video Editor’s AI Voice Generator takes your written instructions and turns them into smooth, natural-sounding voiceovers. This feature is fantastic for breaking down complex techniques in your videos. Forget about the hassle of recording; it gives students a steady audio track for every lesson. Plus, it works well across various subjects, enhancing visual demonstrations and boosting clarity and understanding. This tool helps creators save time, allowing them to focus more on the quality of their content rather than the production process. It’s a real game-changer for making tutorials!
Article continues below advertisement
Why Voiceovers Enhance Tutorial Success
AI voice generators are fantastic tools for creating voiceover tutorials, especially for those who are hearing-impaired or prefer audio learning. They save a ton of time by eliminating the need to record multiple takes, which is a real lifesaver for busy creators. Plus, synthetic voices help maintain privacy, allowing users to stay off-camera. With a consistent tone across various videos, you can establish a recognizable teaching style, and offering different languages can really broaden your audience. This not only boosts engagement but also enhances learning outcomes significantly.
Article continues below advertisement
How To Use CapCut Desktop Video Editor’s AI Voice Generator? Step By Step Guide
Before you jump into it, let me explain how effortlessly you can facilitate your tutorials with CapCut desktop video editor through its AI voice generator. Your choice if you are creating an instructional video or an explainer video for social media, this tool lets you include professional narration without the need for recording equipment. Easy-to-use controls and customizable voices make this the easiest way to generate voice-led content in minutes. Let’s break it down into just three simple steps.
Article continues below advertisement
Step 1: Import Your Footage
Open CapCut desktop video editor and start a new project. Import your video clips or screen recordings you already have, and import them to the timeline.
Article continues below advertisement
Source: SUPPLIED
Article continues below advertisement
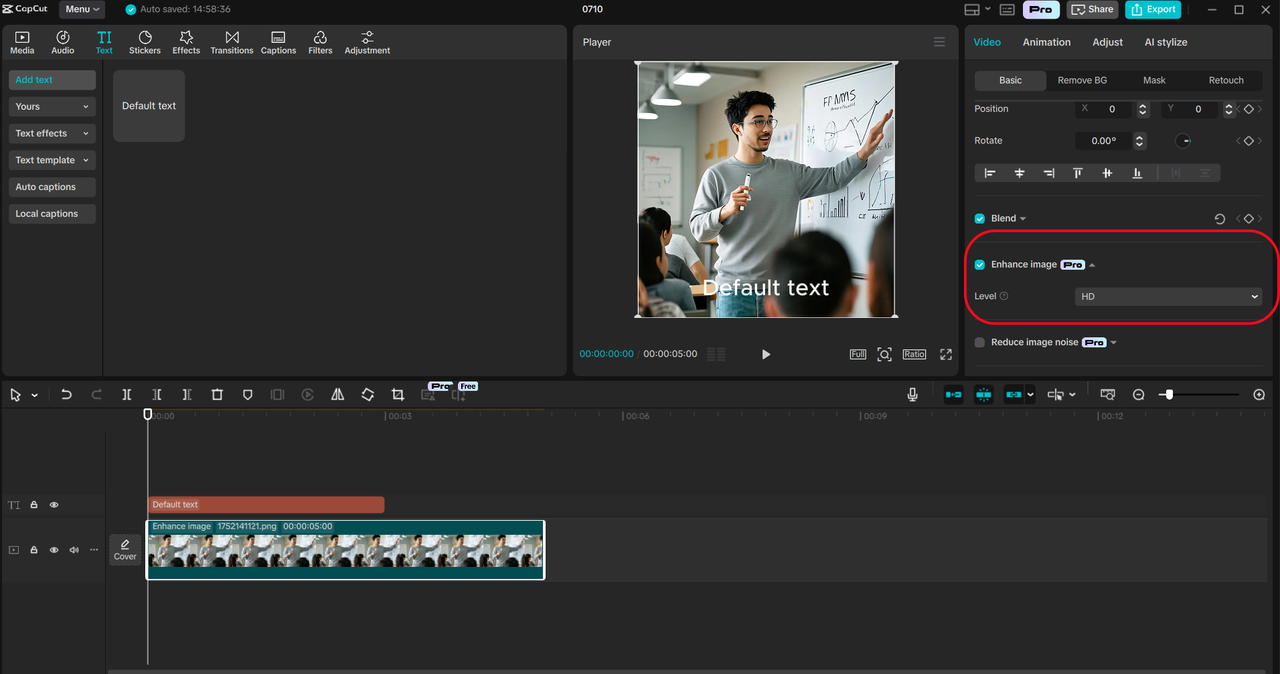
Step 2: Apply an AI video upscaler
MOST READ STORIES TODAY
Should you encounter video source footage that is low in resolution or pixelated, the AI video upscaler will take care of it and improve its quality with the flick of a switch. You just need to click on the “Enhance image” option. This will focus on your image, increase the resolution, and optimise the quality of your visual subject with a single click, making your content look as if it has a professional graphics team behind it before the narration has even been added.
Article continues below advertisement
 Source: SUPPLIED
Article continues below advertisement
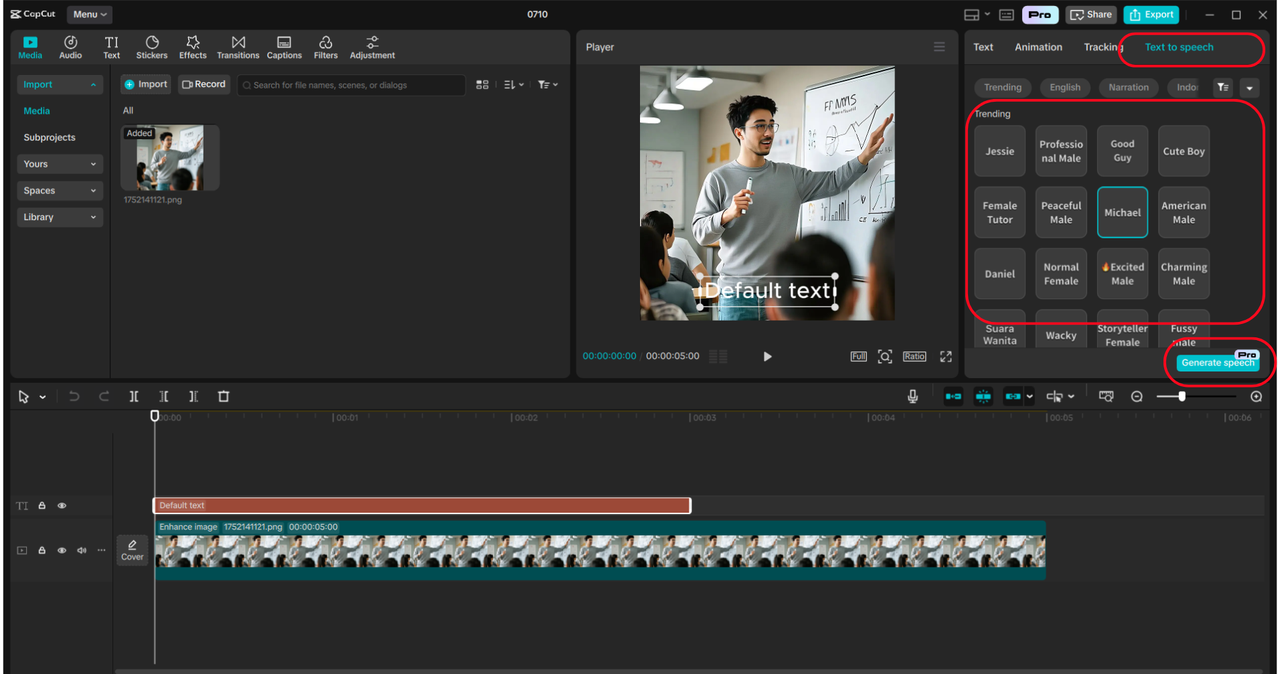
Step 3: Generate Natural-Sounding Voiceovers
Once you have your visuals set up, you’ll want to move to the “Text” tab to type out your script or tutorial. You can use the AI voice generator to turn your text-based content into high-quality audio files that mirror the way people talk and deliver an engaging, replica human voice for everyone. With CapCut’s text to speech AI, you can also fine-tune pitch, speed, and pacing to the mood of your content. When you’re satisfied with the voice, play it back and drag it to the timeline, where it syncs to your visual prompts.
Article continues below advertisement
 Source: SUPPLIED
READ MORE ON Misc
Article continues below advertisement
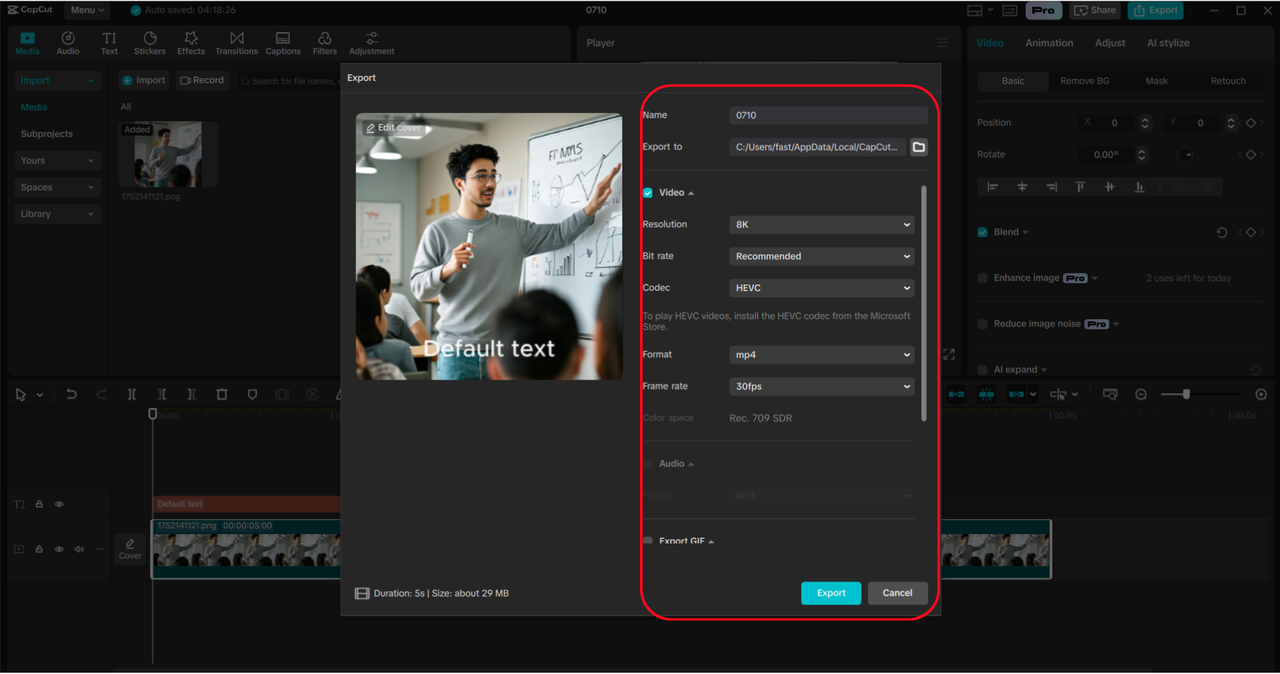
Step 4: Synchronize, Finalize and Export
![]()
Never Miss an

Daily updates from the heart of Hollywood, right to your inbox
By entering your email and clicking Sign Up, you’re agreeing to let us send you customized marketing messages about us and our advertising partners. You are also agreeing to our Terms of Service and Privacy Policy.
Once your video is complete, perfect your sound by syncing the voiceover to your footage. Enhance your videos with your own music or on-screen highlights, or points of interest. Assuming you’ve applied the AI video upscaler, again, you should export the final outcome in high resolution (maybe 1080p or, better yet, 4K) for a greater impact. Select MP4 format, and you’re all set to release your professionally narrated, AI-boosted clip on platforms like YouTube, TikTok, or your own website.
Article continues below advertisement
 Source: SUPPLIED
Conclusion: Create Tutorials with Confidence
The AI Voice Generator in CapCut’s Desktop Video Editor makes it super easy to add voiceovers to your tutorial videos with just a single click. This AI voiceover feature delivers professional-quality audio, so you won’t have to worry about recording your own voice. It really enhances the learning experience and helps you reach a wider audience with minimal effort. You can grab CapCut from the official website, and while it has some great features, keep in mind that a few features require a premium subscription. This tool is perfect for creating tutorials that inspire and educate people everywhere!