
Table of ContentsHow to Add Copilot Pro to Microsoft 365 AppsHow to Use Copilot in WordHow to Use Copilot in ExcelHow to Use Copilot in PowerPointHow to Use Copilot in OneNoteHow to Use Copilot in Outlook
Microsoft’s Copilot is an AI assistant built into Windows and available on the web, but there’s also a premium version that kicks in a few extra benefits. If you pay $20 per month for Copilot Pro, you get built-in AI support for Word, Excel, Outlook, and other Microsoft 365 apps.
Using Copilot Pro, you can ask AI to help you write and edit text or summarize documents in Word, generate formulas and analyze data in Excel, create presentations in PowerPoint, create notes in OneNote, and draft replies and summarize emails in Outlook. Here’s how it works.
How to Add Copilot Pro to Microsoft 365 Apps
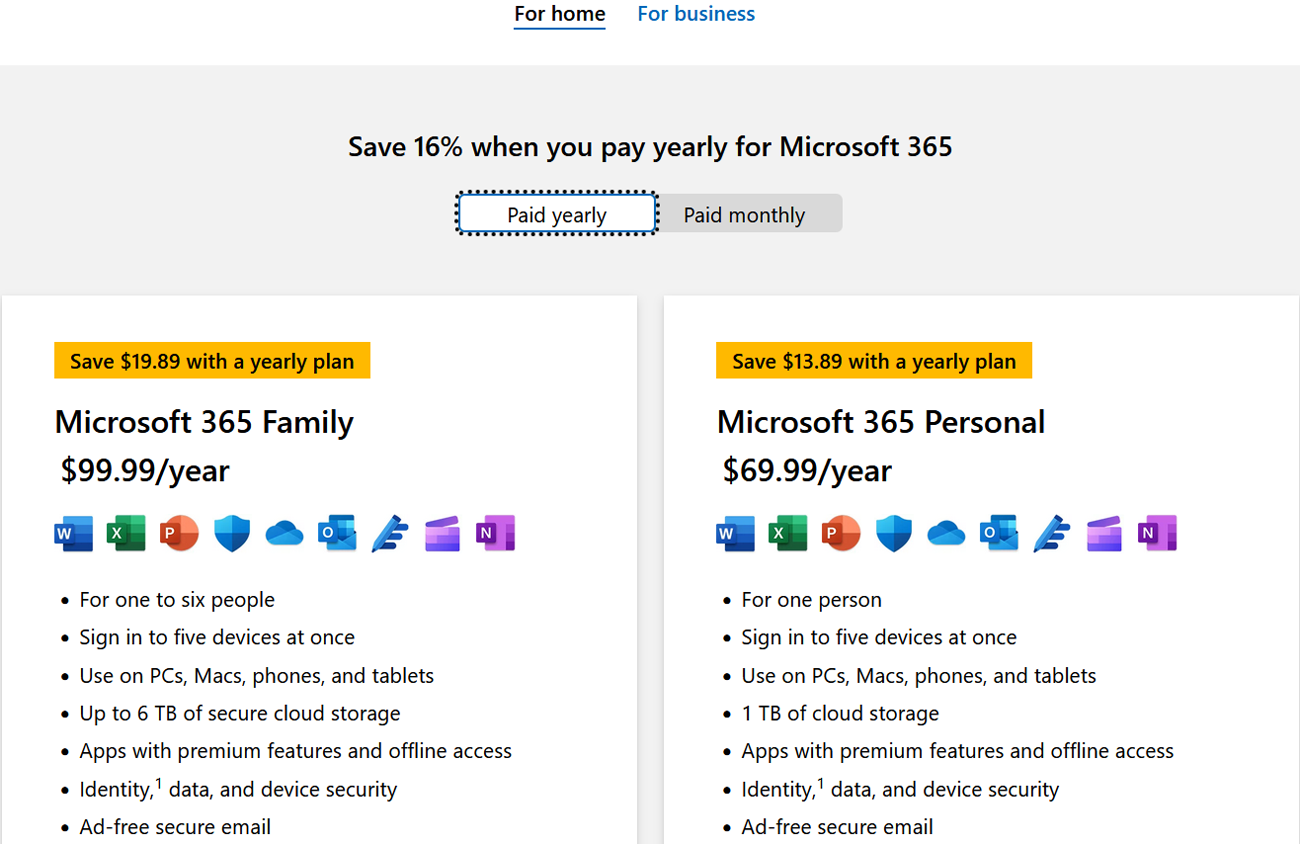
First, you need a subscription to Microsoft 365 Personal or Family. For $69.99 per year, the Personal plan offers access to Microsoft’s collection of apps and other features for one person on up to five devices. The $99.99 Family plan allows up to six people to access these benefits.
 (Credit: Lance Whitney / Microsoft)
Next, you’ll need to sign up for Microsoft Copilot Pro, if you don’t already have it. While you can get Copilot Pro on its own, you need a Microsoft 365 subscription to use it with 365 apps.
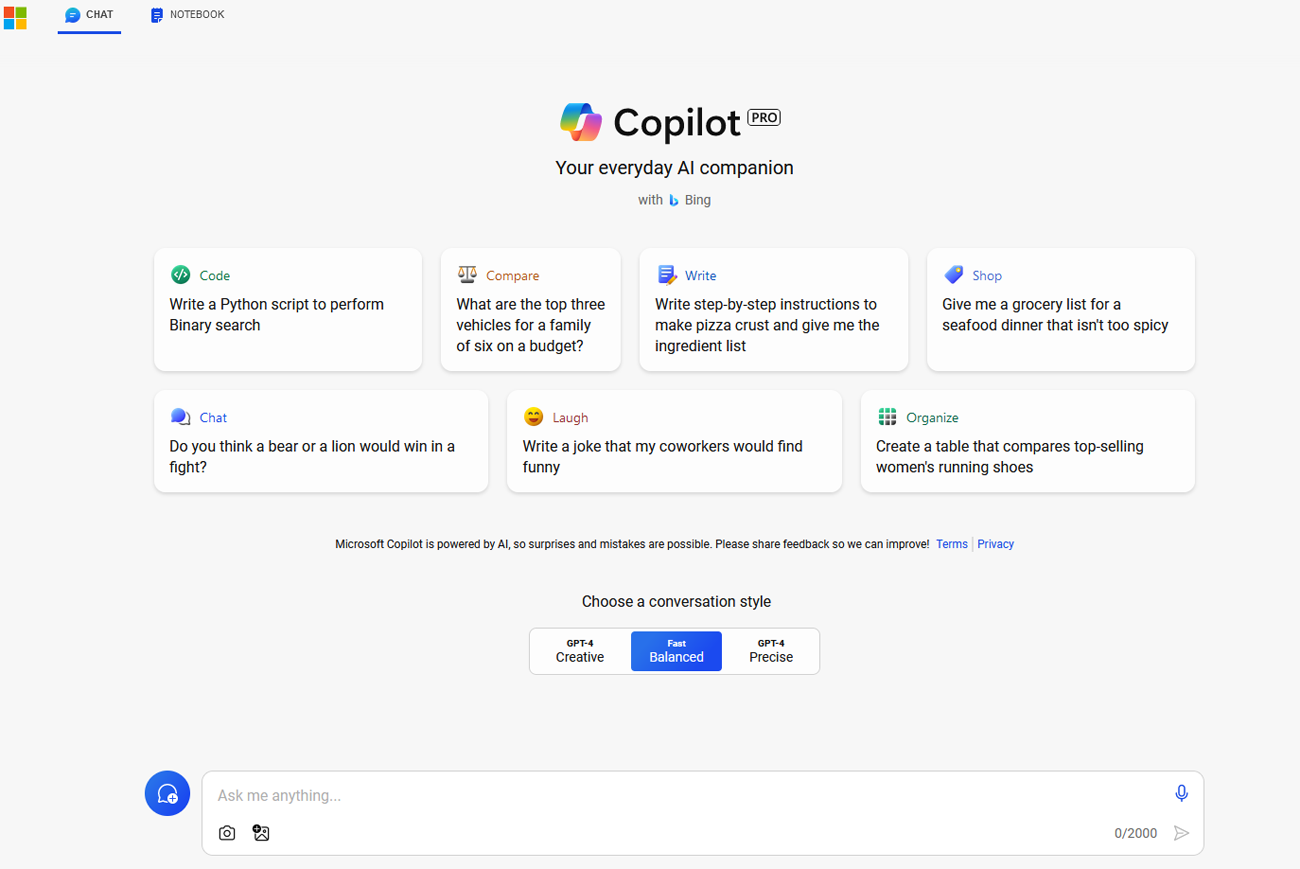
To sign up, head to Microsoft’s Copilot Pro web page and click Get Copilot Pro. At the subscription page, confirm your payment method and click Subscribe. After the payment goes through, click Get started. You’re taken to the Copilot web page, where you’ll see Pro as part of the Copilot logo.
 (Credit: Lance Whitney / Microsoft)
How to Use Copilot in Word
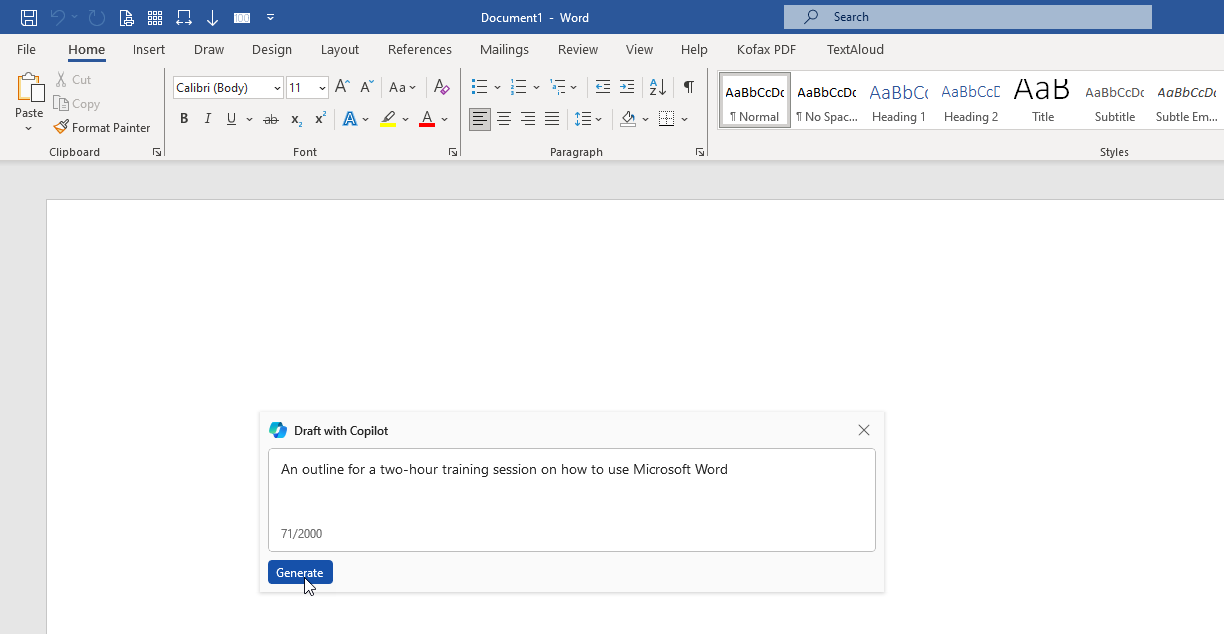
Now when you launch a blank document in Word, you should see a small window on the screen called Draft with Copilot. If you don’t see the window, click the Draft with Copilot icon in the left margin or use the Alt-I shortcut. The message in the window prompts you to describe what you’d like to write. Think about the type of document you want to create, enter a description in the appropriate field, and then click the Generate button.
 (Credit: Lance Whitney / Microsoft)
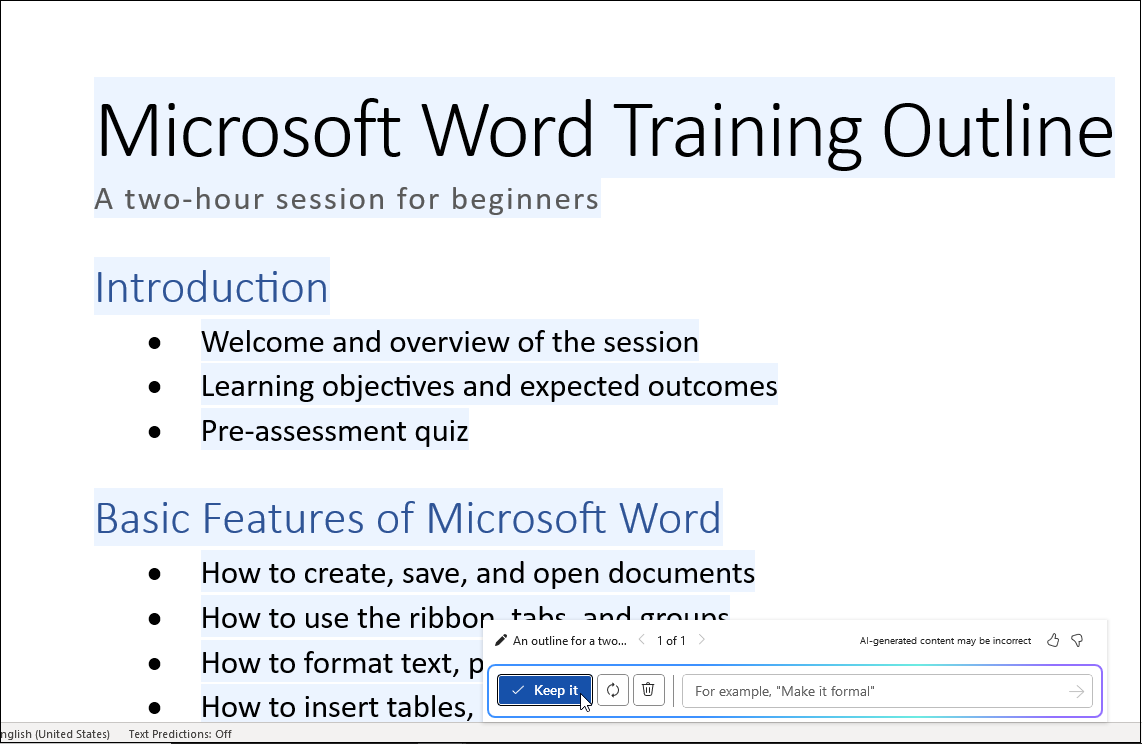
Copilot generates a draft of the document you requested. At the bottom is a small window where you can respond to the draft. Click Keep it to retain the draft as it currently appears. You can also select the Regenerate icon to request a new version of the draft from scratch or click the trash can icon to delete it.
 (Credit: Lance Whitney / Microsoft)
If you want Copilot to make a change to the existing outline, click the text field and type something like “Make it more formal” or “Make it shorter.” After Copilot revises the draft and displays the new version, click the left and right arrow to switch between the initial draft and the new one. You can request as many drafts as you need. You can also click in any blank area of an existing document to get Copilot’s help in writing a new sentence or paragraph.
 (Credit: Lance Whitney / Microsoft)
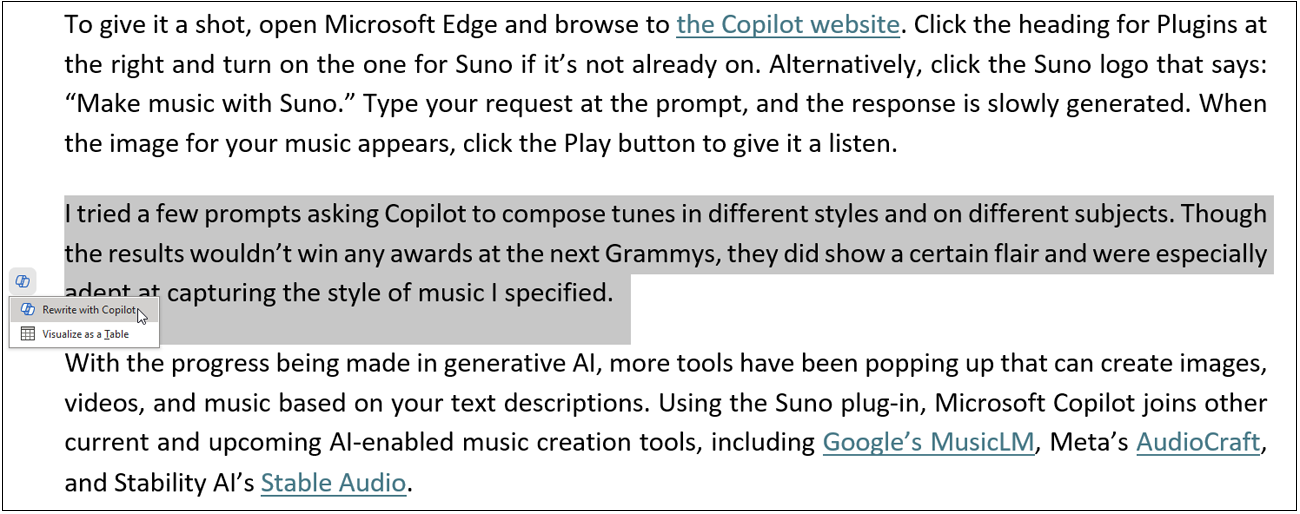
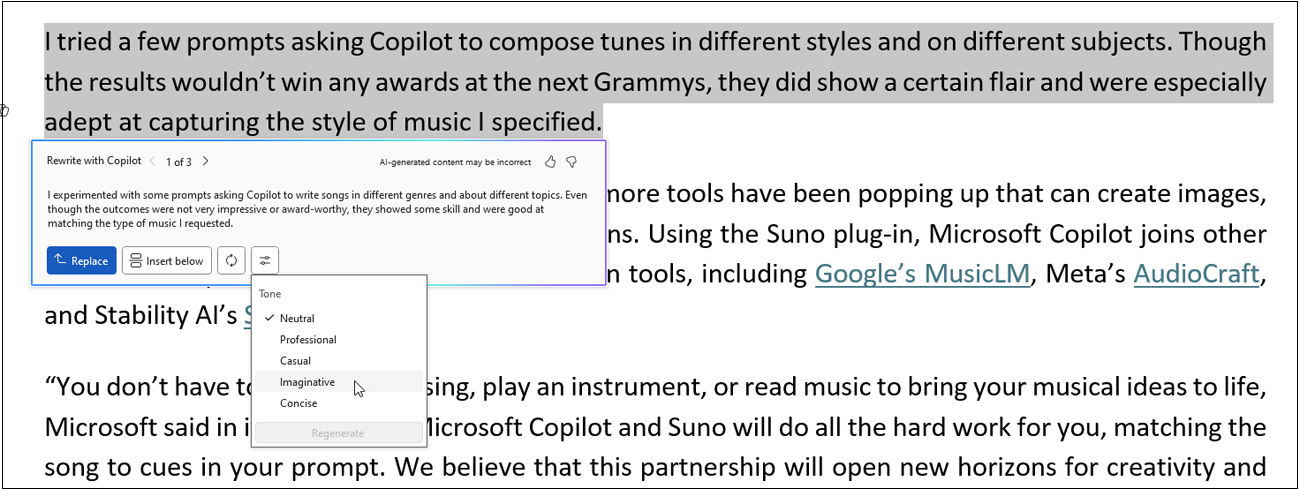
Copilot can also be used to revise existing text. Select the written portion that you want revised, then click the Draft with Copilot icon and select Rewrite with Copilot. The new version appears in the text window. Choose Regenerate to request another version or click Adjust Tone, select a different tone, and then hit Regenerate to try again. Click Replace to overwrite the existing text or Insert Below to add the new version below the existing one so you can compare the two.
 (Credit: Lance Whitney / Microsoft)
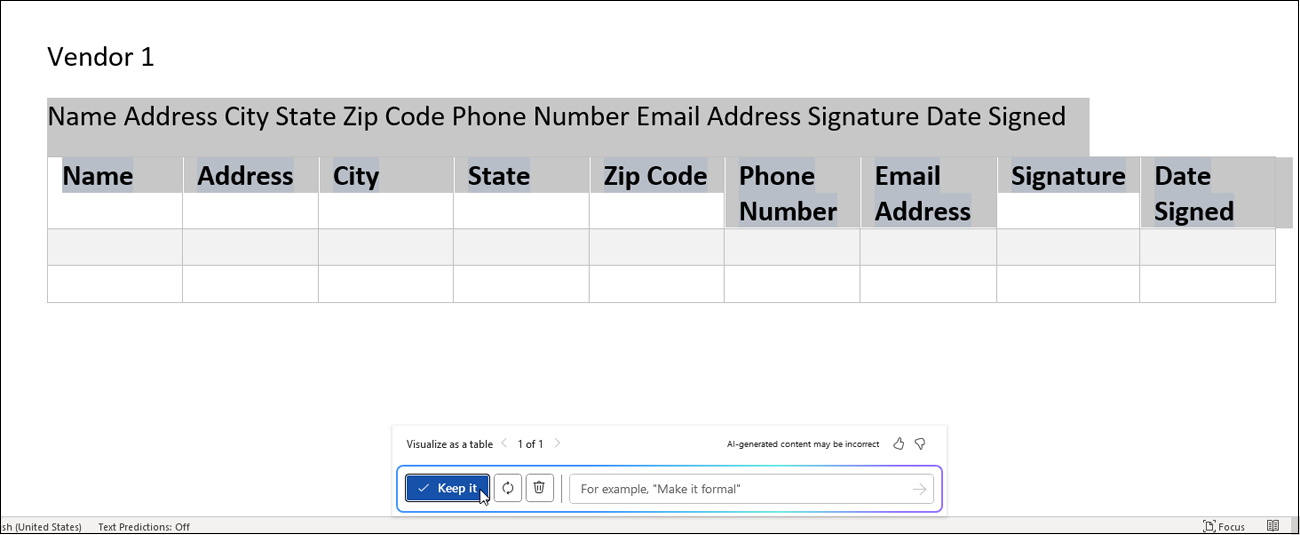
Ever create text in a Word document that you think might look better in a table? Ask Copilot for help. Select the text you want in a table, click the Draft with Copilot icon, and select Visualize as a Table. After the table appears, you can opt to discard it, regenerate it, or keep it.
 (Credit: Lance Whitney / Microsoft)
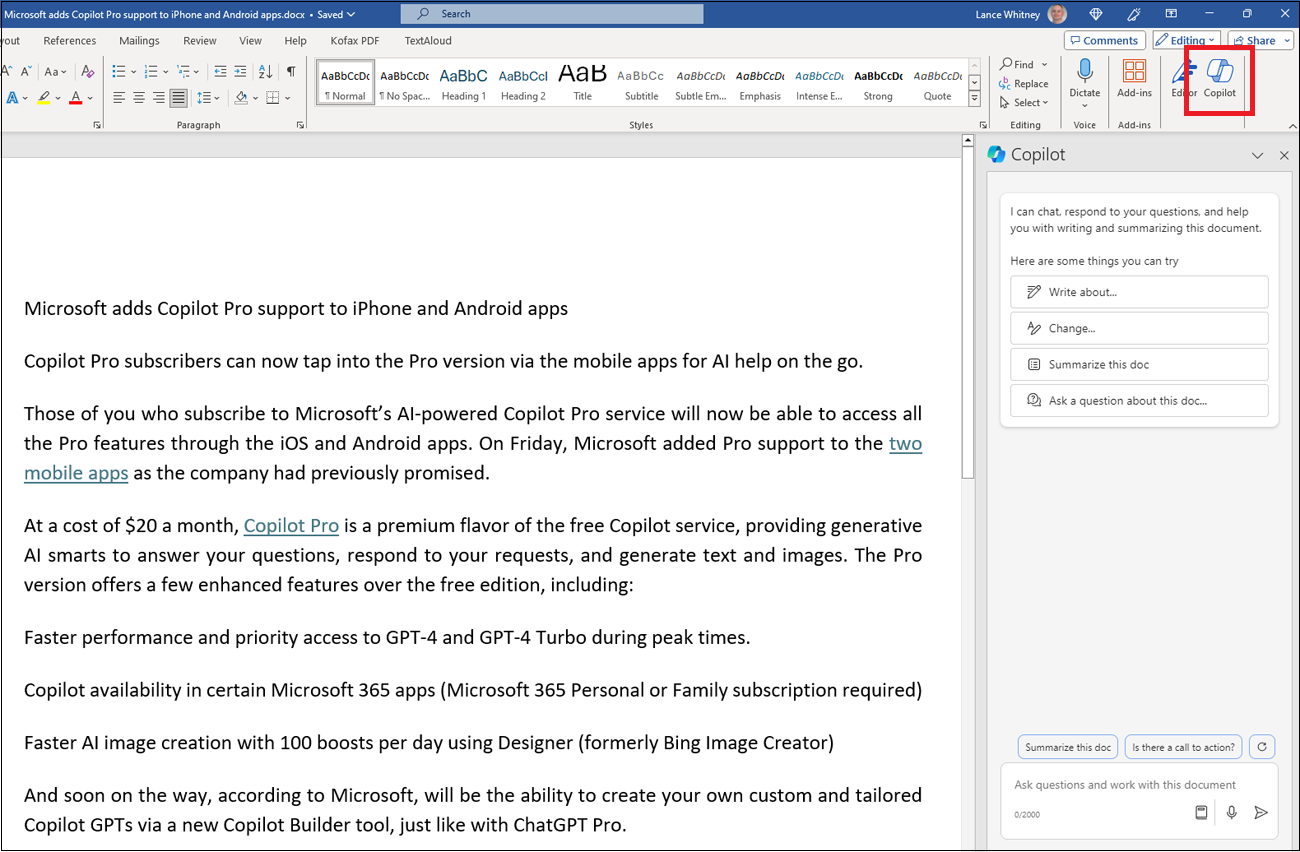
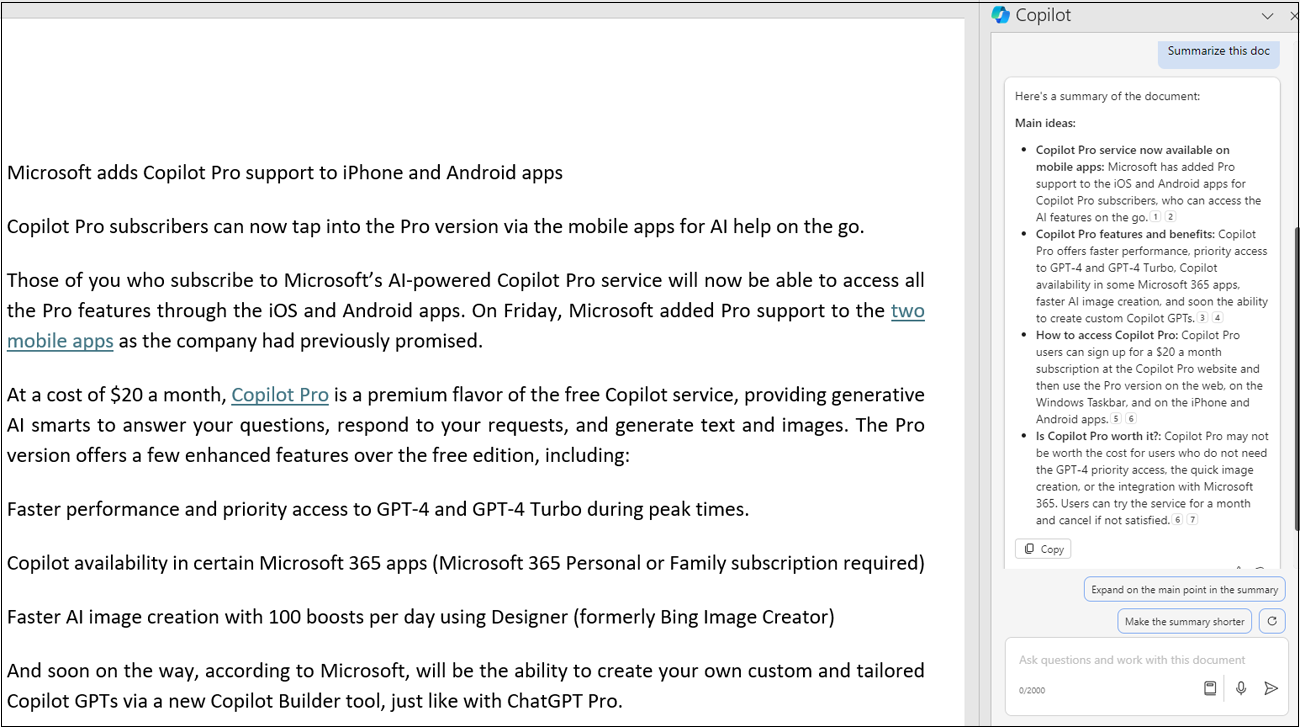
You can also summarize and ask questions about an existing document. Open the document you want to use and click the Copilot icon on the Ribbon. Copilot suggests some requests you can make regarding the document, such as summarizing it or asking specific questions about it.
 (Credit: Lance Whitney / Microsoft)
Submit the request to summarize the document, and Copilot generates and displays a summary in the sidebar. You can also use the text field at the bottom of the window to ask more specific questions about the content in the document. You can then copy any response from Copilot and paste it elsewhere.
 (Credit: Lance Whitney / Microsoft)
How to Use Copilot in Excel
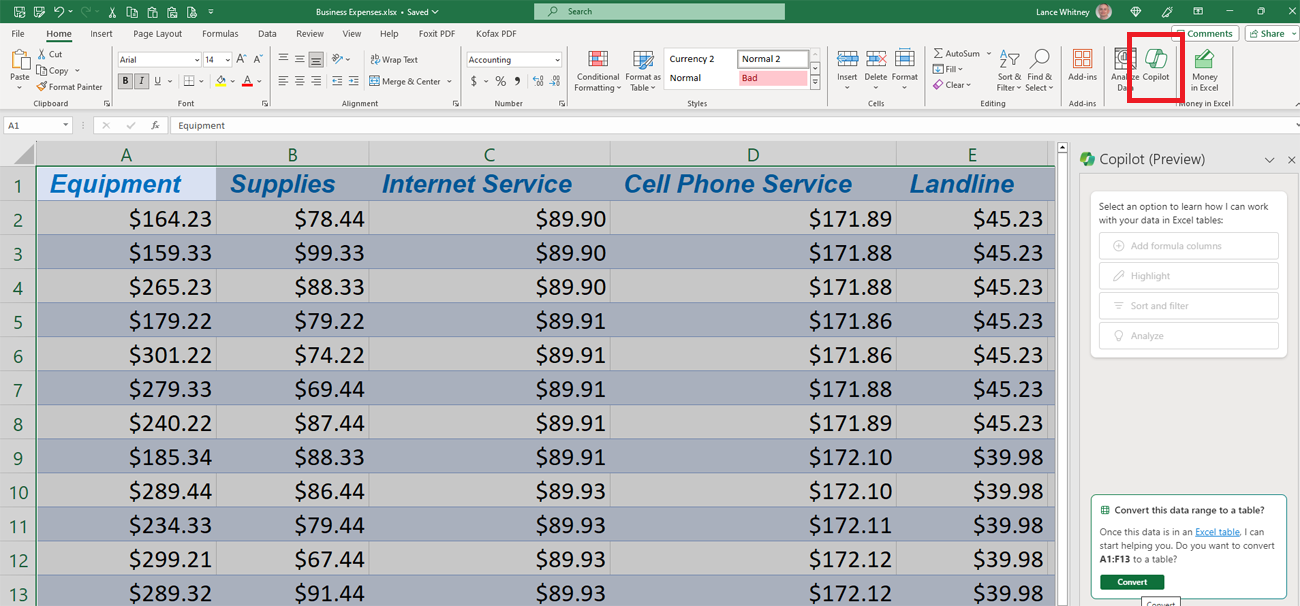
Unlike Word, Copilot in Excel imposes certain restrictions before you’re able to use it. Your Excel files must be saved in the .xlsx or .xslm format and the data should already be formatted as an Excel table. You can also only work with files stored in OneDrive or Microsoft 365 SharePoint with AutoSave enabled.
To enable AutoSave, open your spreadsheet and go to File > Options > Save, then enable AutoSave files stored in the Cloud by default in Excel. You can also open a spreadsheet that is saved locally, save it to OneDrive or SharePoint, close it, and then reopen it from the cloud.
 (Credit: Lance Whitney / Microsoft)
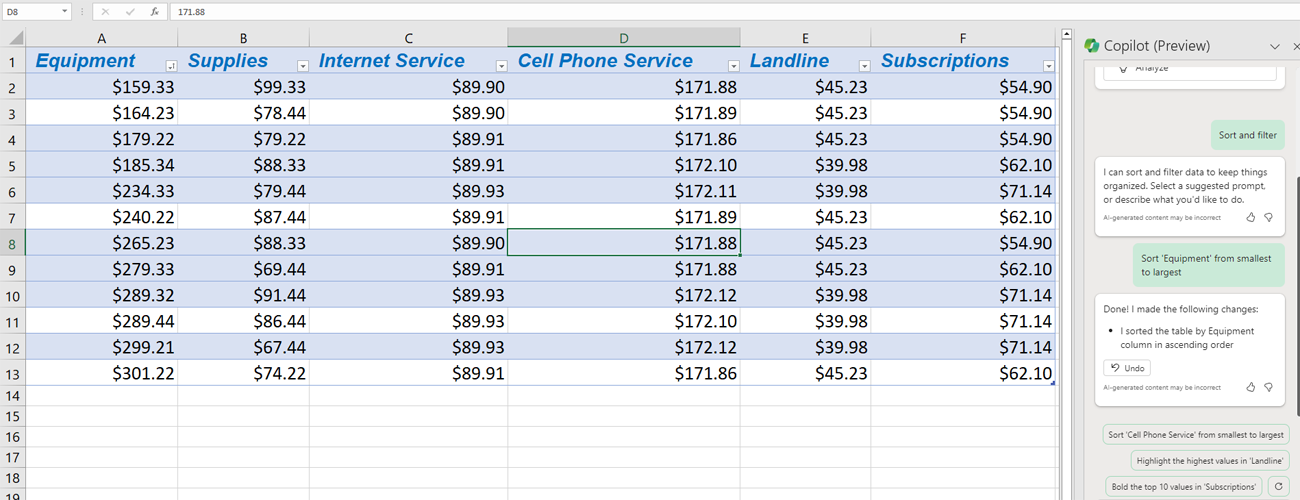
Ready to use Copilot to analyze your data? Select all the cells that you want to include and click the Copilot button on the Ribbon. You may see a message in the sidebar asking if you want to convert this data range to a table. Click the Convert button, if prompted, and the data is formatted into a table with a header row at the top and sample requests you may want to submit.
 (Credit: Lance Whitney / Microsoft)
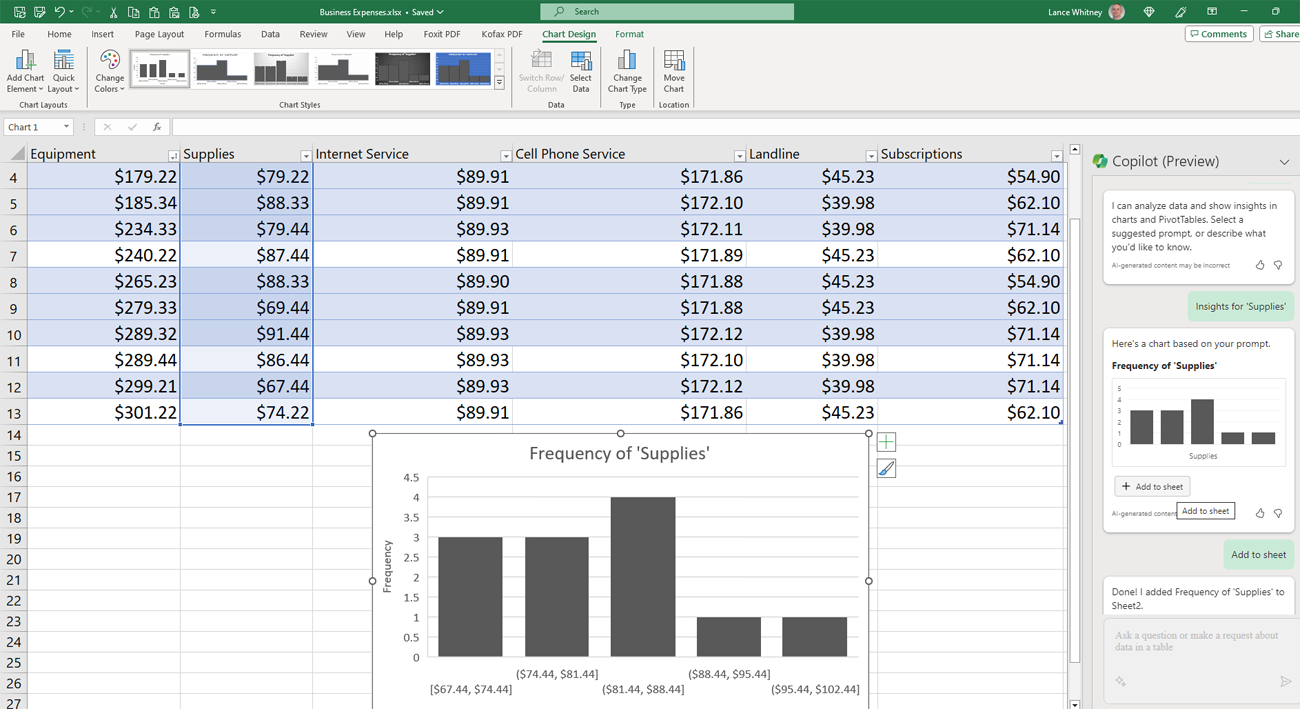
Select any of the requests that you find useful. For example, you could add a column that contains a formula, highlight certain cells, or sort and filter the data in a specific way. You can also analyze the data. Click the Analyze button and then select one of the suggested requests or type your own. In some cases, Copilot may create a chart that you can add to the spreadsheet.
 (Credit: Lance Whitney / Microsoft)
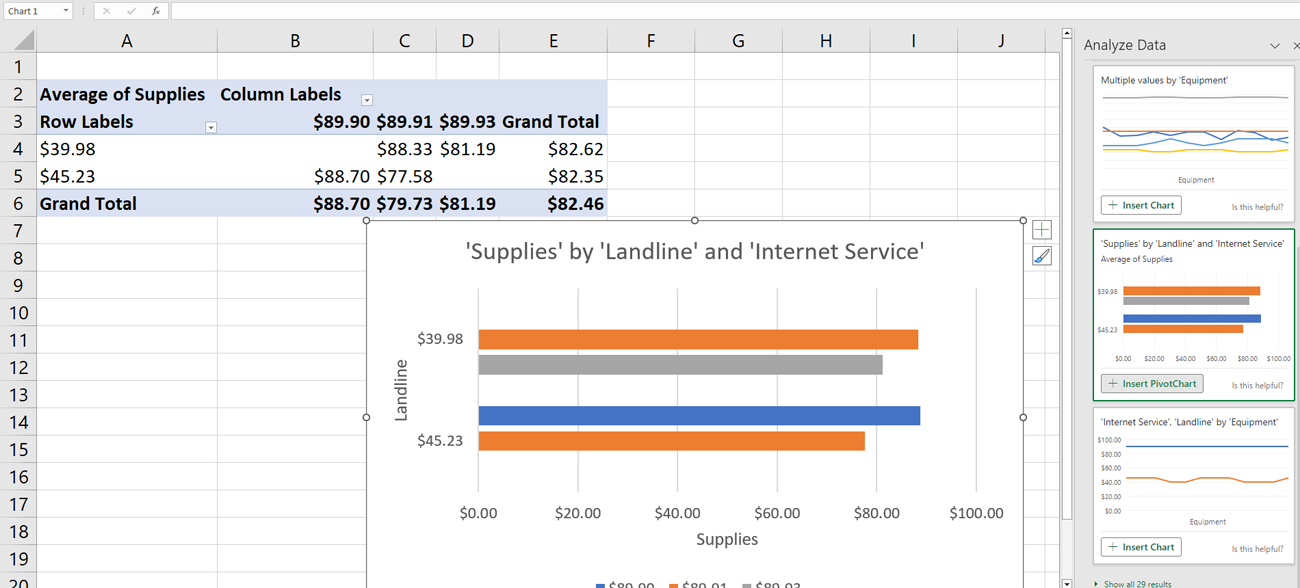
For different types of data analysis, close the Copilot sidebar and click the Analyze Data button on the Ribbon. At the sidebar, you can ask a question about the data, request a pivot table, or add a chart. Choose your preferred action to see the results.
 (Credit: Lance Whitney / Microsoft)
How to Use Copilot in PowerPoint
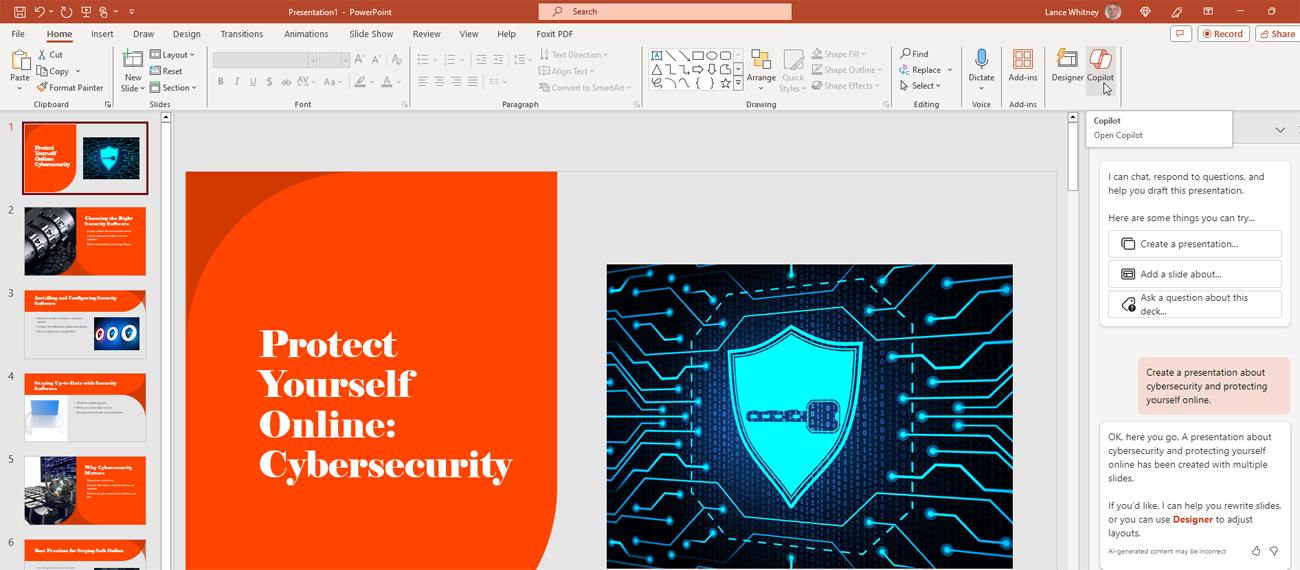
In PowerPoint, Copilot will help you create a brand new presentation or refine an existing one. To start with a new one, create a blank slideshow and click the Copilot icon on the Ribbon. Click the Create a presentation suggestion and then enter the topic of your slideshow. After you submit the request, Copilot generates the title slide and a few subsequent slides.
 (Credit: Lance Whitney / Microsoft)
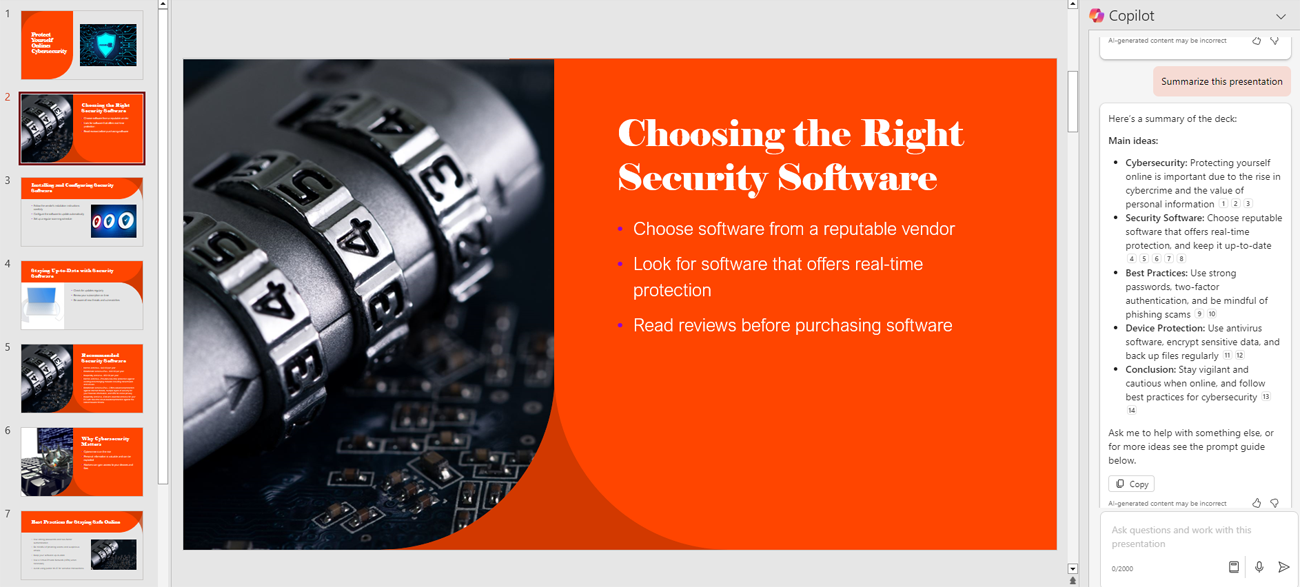
You can add to the presentation by submitting another request. For example, you might tell Copilot to add more slides that cover a specific subtopic. You can also ask for a summary about a particular slideshow.
 (Credit: Lance Whitney / Microsoft)
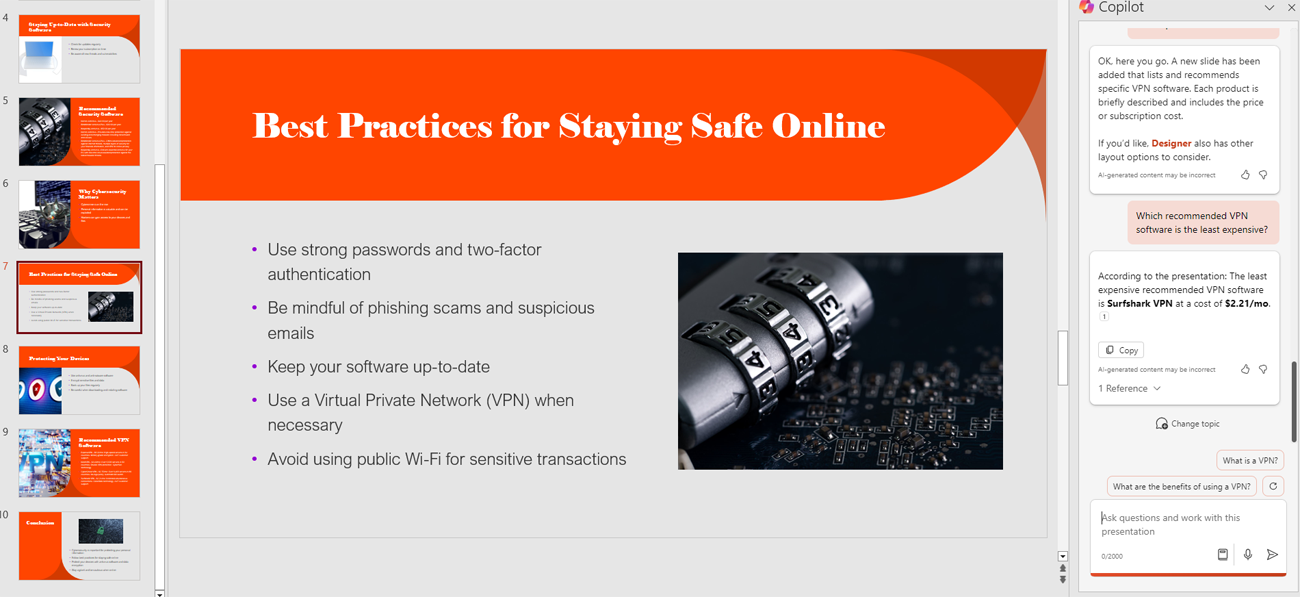
Copilot also allows you to ask specific questions about a presentation in order to dig up certain details. Write a request that asks for key information contained in one or more of the slides, and the AI will respond with the information it finds in the slideshow.
 (Credit: Lance Whitney / Microsoft)
How to Use Copilot in OneNote
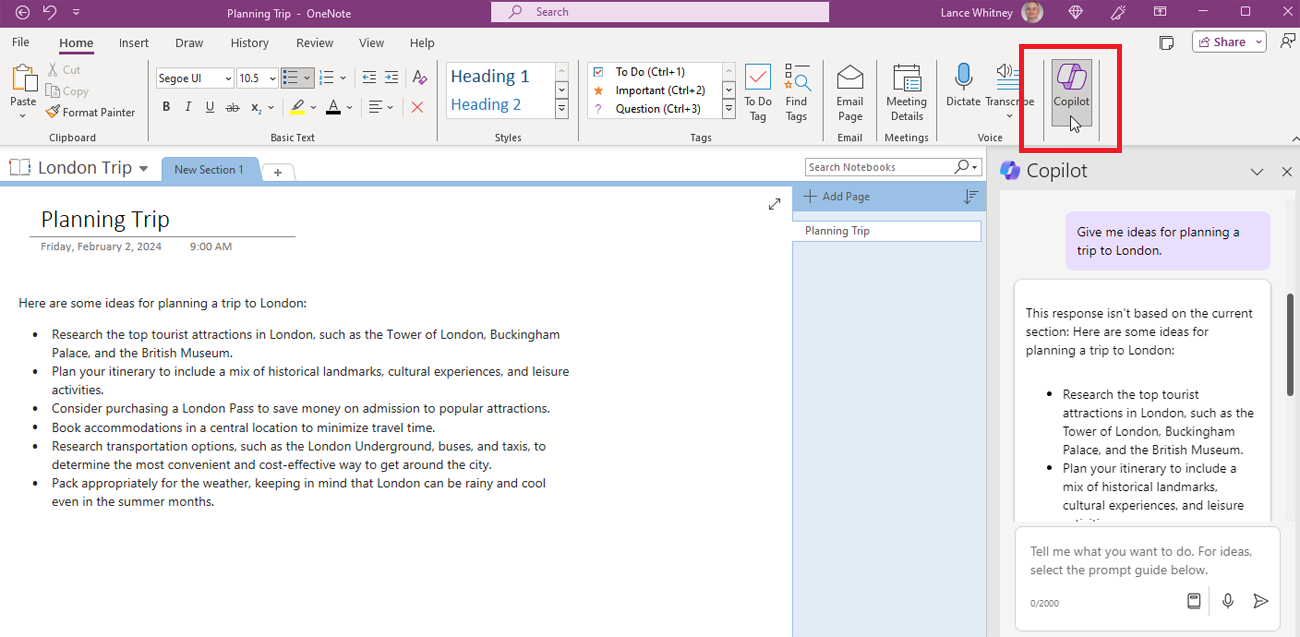
With OneNote, Copilot will try to help you generate ideas and create notes for a notebook. Open OneNote and click the Copilot icon on the Ribbon. If you’re stuck coming up with ideas in the first place, click the Give me ideas suggestion, then add the topic that you want to capture. You can then copy Copilot’s response and add it as a note.
 (Credit: Lance Whitney / Microsoft)
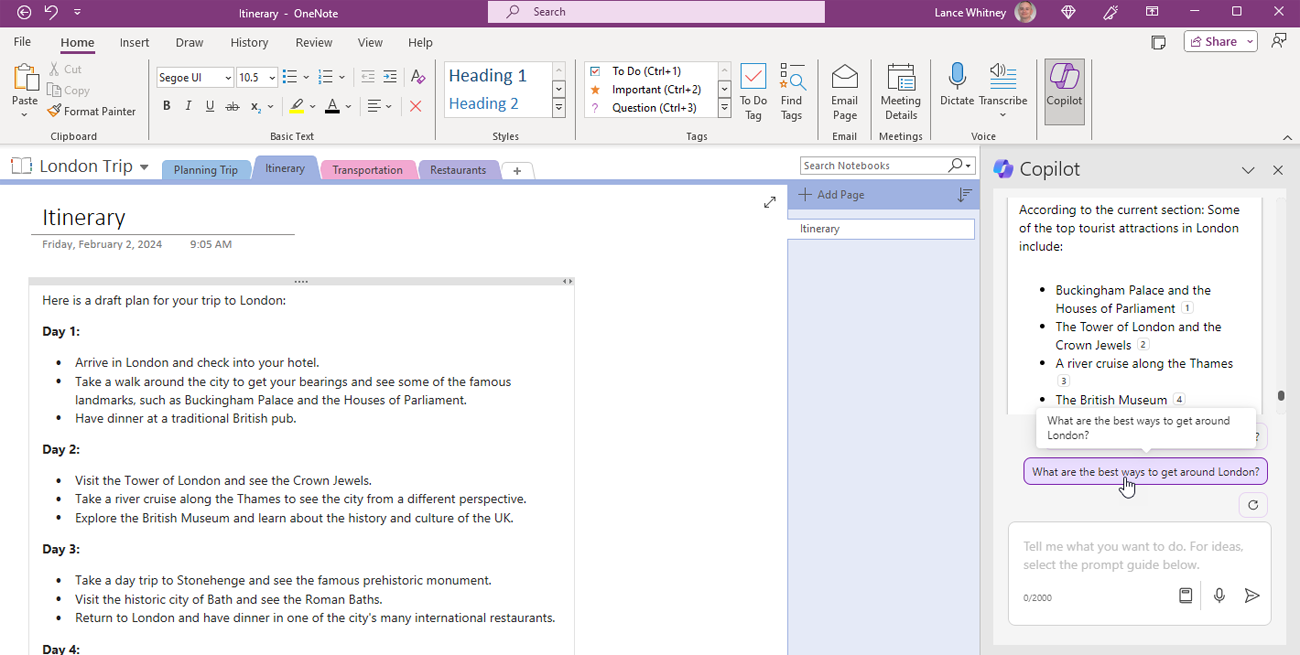
Ask follow-up questions to flesh out your topic and add more ideas. You can then organize these ideas into different notes to comprise your overall notebook. You could also try asking Copilot to summarize the information based on the notes you’ve created. Select a specific section in your notebook and ask Copilot for a summary of the key data.
 (Credit: Lance Whitney / Microsoft)
How to Use Copilot in Outlook
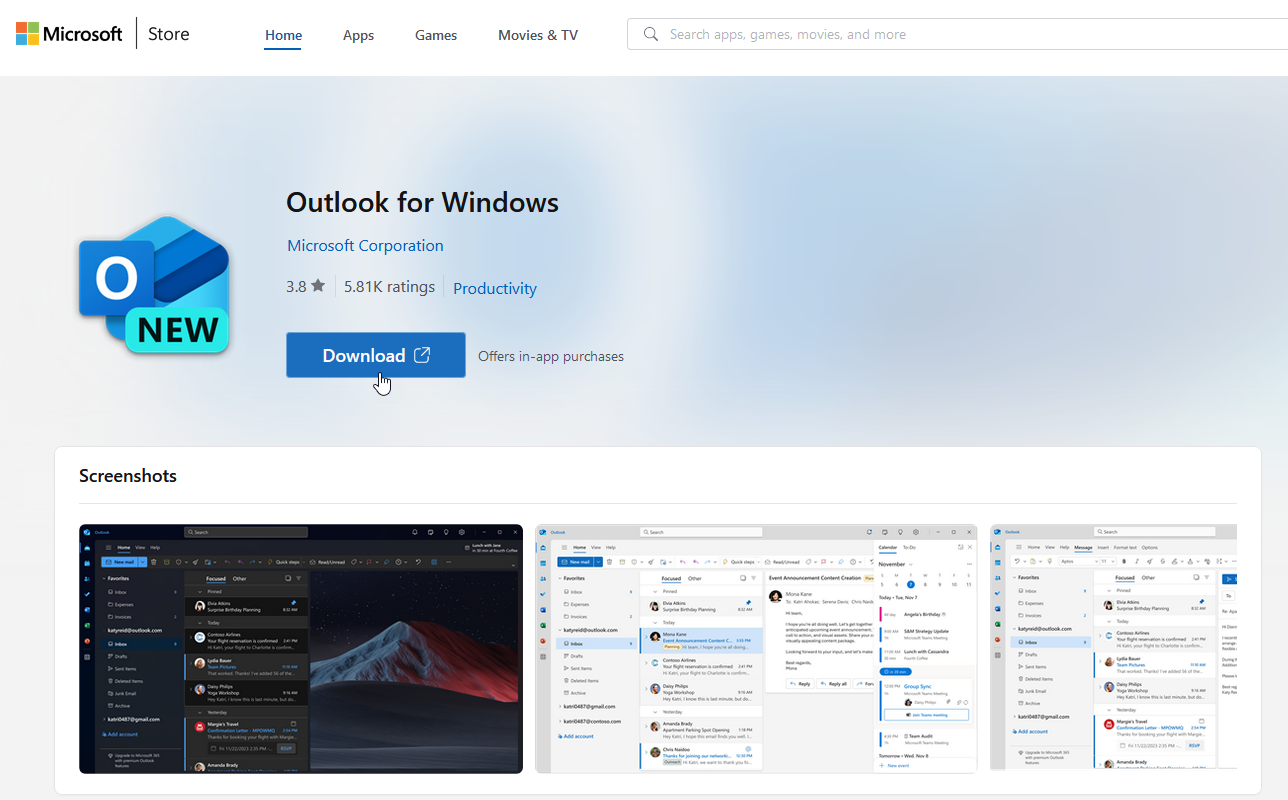
To try Copilot Pro in Outlook, you’ll need the correct version. The AI doesn’t work in the classic Outlook for Windows, which is part of the Microsoft 365 suite. Instead, you need what Microsoft calls the new Outlook. To get this new version, head to its Microsoft Store page and click Download.
 (Credit: Lance Whitney / Microsoft)
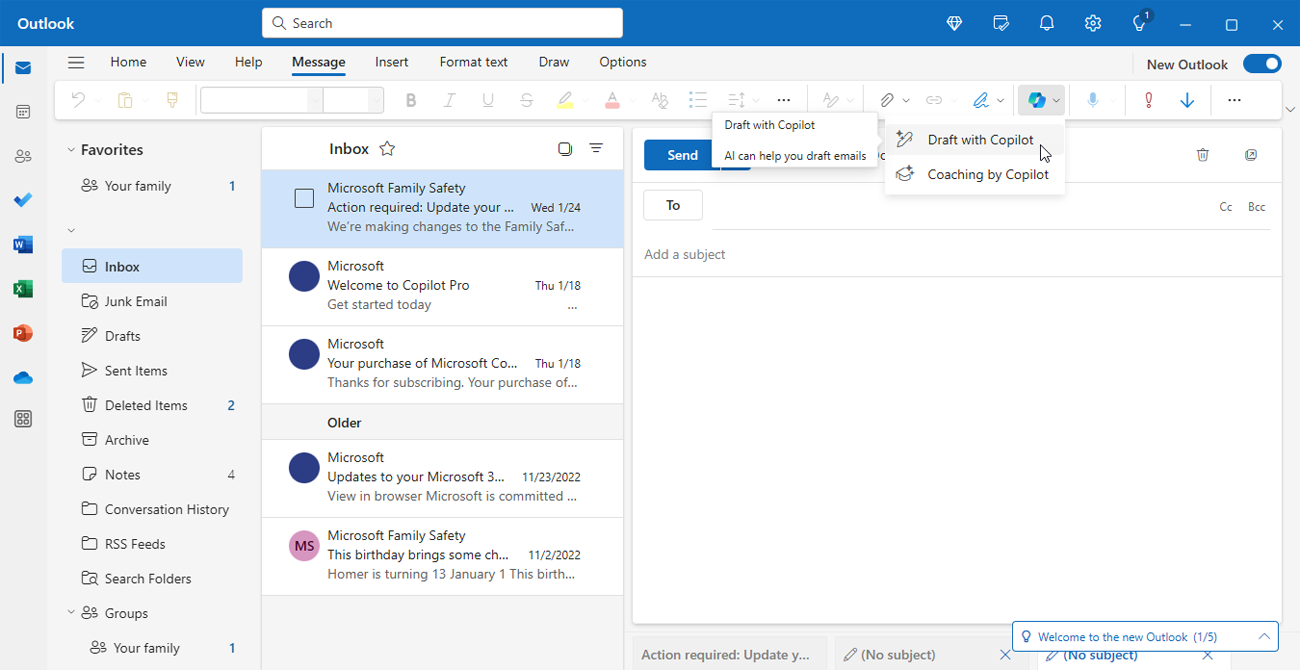
Open the new Outlook app and sign in with your Microsoft account. First, you may want to get Copilot’s help to draft a new email. Click the New Mail icon, enter an address, and add a subject. Once you’re in the body of the message, click the Copilot icon on the toolbar and select Draft with Copilot.
 (Credit: Lance Whitney / Microsoft)
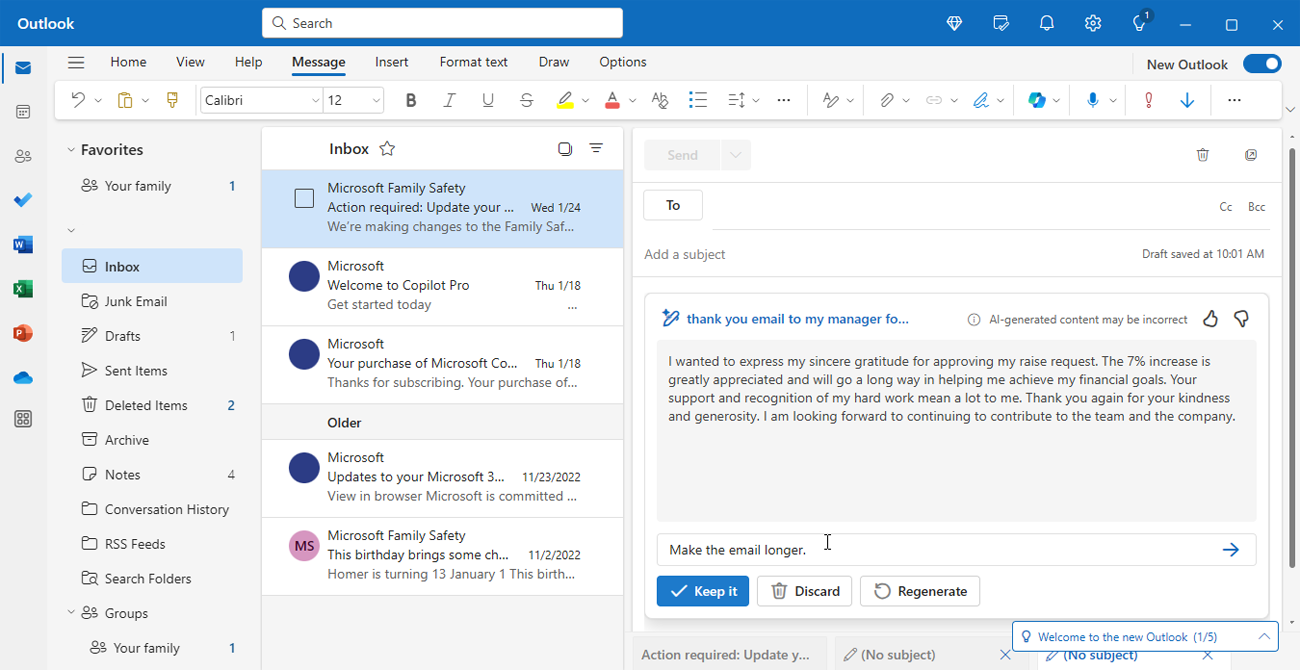
In the Draft with Copilot window, describe the type of email you want to write. For example, maybe you want to send an email to your manager thanking them for approving a recent raise. Click the Generate button, and Copilot creates a draft.
You can then regenerate the response to get a different version, discard the draft, or keep it. You can also ask Copilot to revise the draft by adding further guidance, such as telling it to make the message more formal, more casual, longer, or shorter. When you find a draft you want to keep, you’re able to revise and personalize it.
 (Credit: Lance Whitney / Microsoft)
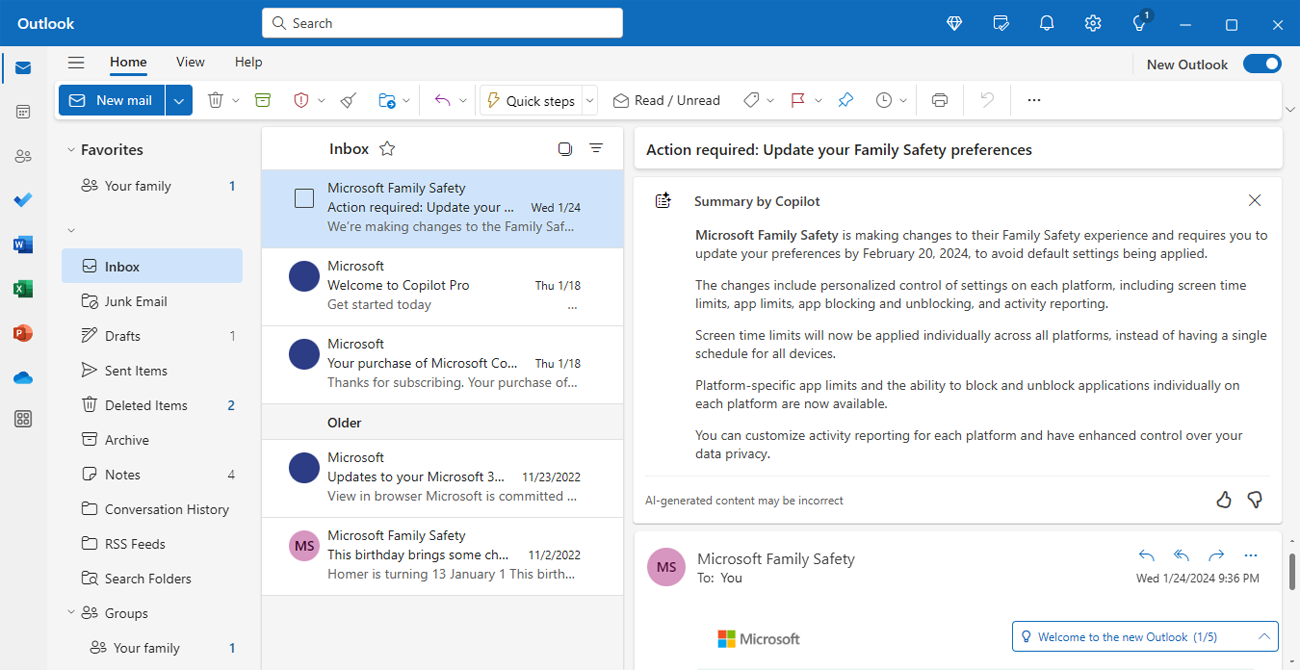
Copilot can also be used to summarize an email you’ve received. After you select the message in your inbox, a Summary by Copilot prompt should appear. Click that, and Copilot generates a summary with all the key points in the message.
 (Credit: Lance Whitney / Microsoft)


