


Even though I’ve bought many AI anime tutorials,
I still haven’t posted a single video.
I wrote this article
for people like that.
Even when I open the tutorials I bought,
I end up finishing
after reading just the first few pages.
Thinking, “I bought another one,”
I quietly close the screen.
Repeating that cycle,
time just keeps passing
without being able to post a single video…
Have you ever had that experience❓
Even when you try to make a video with AI,
sometimes it doesn’t move
the way you want it to.
At times like that,
it’s okay not to force yourself
to keep remaking it.
There is a method to make short videos using still images,
but I haven’t tried that method
this time.
In this note,
I will introduce the steps to complete an AI anime with movement
as your first video,
and aim to get it posted.
You don’t have to show your face or use your voice.
This article
is not a method
for earning revenue immediately.
It is content aimed at people who
just want to post their first video.
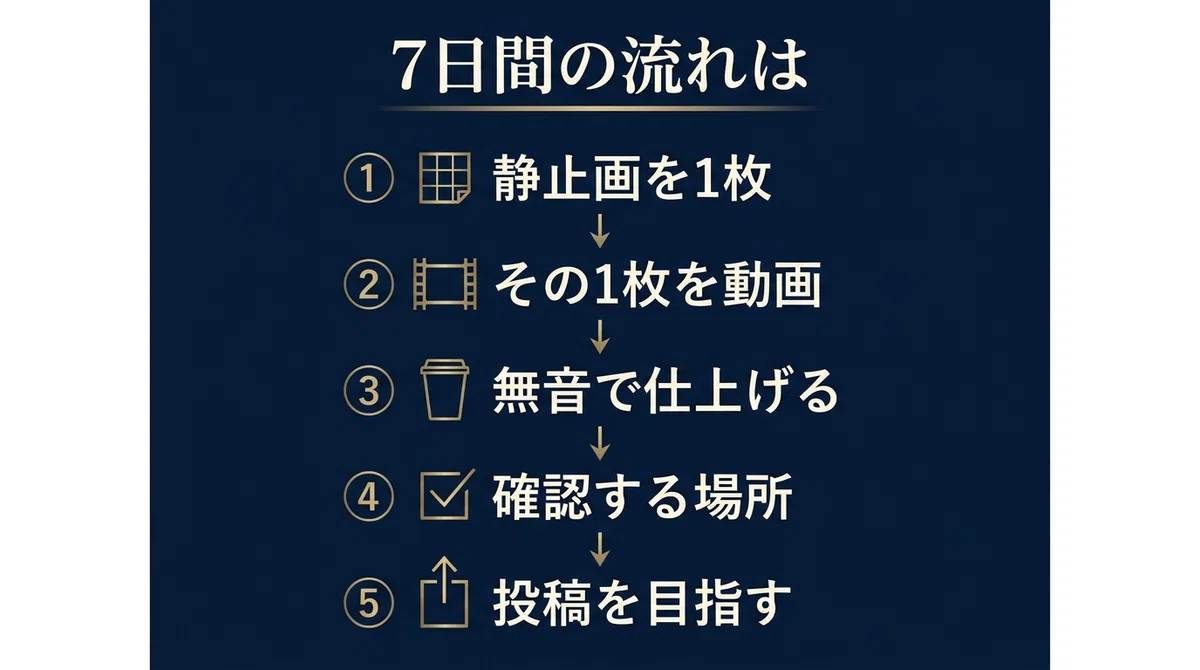
The 7-day flow is like this.
On the first day, decide on the video subject and
the screen you want to show at the end,
and check the candidates for the image generation AI you will use.
On this day, you won’t generate any images yet.
On the second day, decide on one image generation AI to use,
and check the app you will open.
On the third day, output one still image
and fix it.
On the fourth day, turn that one image into a video.
On the fifth day, prepare FFmpeg
on your Windows PC,
and confirm that the version information is displayed.
On the 6th day,
check the video for any major glitches,
and narrow down the fine-tuning to one point.
On the 7th day, create the version for posting,
and aim to publish it.
The 7-day schedule is just a guideline.
The time required will vary
depending on your production environment and generation results.
Even if there is a day you cannot work,
there is no need to force yourself to
catch up the next day.
In this article,
in addition to the 7-day progress plan,
I will also introduce
prompts for creating images and videos.
There are two types of prompts: one for videos showing only hands, and
one for videos showing a face.
I have also compiled
solutions for when things do not go as planned along the way.
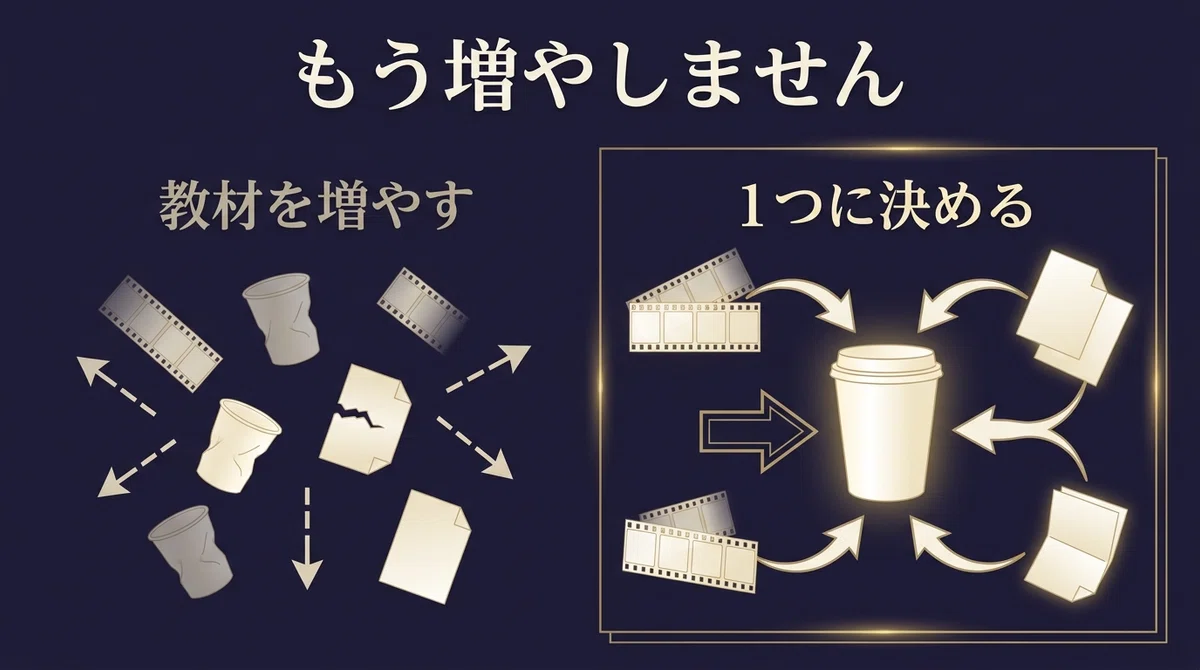
Let me be clear.
There is no need to
increase your learning materials or
memorize long prompts.
However, for finishing the video,
you will use the free tool FFmpeg.
The finishing procedure introduced here
is for Windows PCs.
Preparation, command input, and
checking the resolution and SAR (sample aspect ratio) of the
original video are required.
The procedure is explained in Chapter 3.
First, check the candidates for image generation AI, and
decide on one AI to use on the second day.
Save one image generated by that AI
first.
In this article, the saved image is
referred to as the “anchor.”
The “anchor” here refers to
the single image used as a reference
when creating the video.
The areas you check will change depending on the subject.
If it is a hand, look at the hands and fingers.
Also, check the shape of the cup and
the brightness of the background.
If a face is visible, check the direction of the face.
Also check the shape of the eyes and the brightness of the background.
Do not post if it remains significantly distorted.
I will not write down the positions of operation buttons.
This is because the screen may be updated.
Please proceed according to the current display.
Whether you can actually post depends on the generation results and the conditions of the posting platform.
Write your subject on paper in one line.
A hand holding a cup in a dark room.
That length is sufficient.
If it is a video with a face,
a person’s face by a window is also fine.
For both, pair the image prompt with the video prompt.
For a hand, use a prompt where the hand moves slightly.
If a face is visible, use a prompt just for blinking.
Here is an example for an image.
Japanese anime-style illustration.
A hand holding a cup in a dark room.
Soft lighting, calm atmosphere.
The example for the video is,
hand moves slightly.
The example for a face is,
blinking only.
Do not animate anything else.
While working on the first video, the back of the paper remains empty.
Write the next subject after the first one is done.
If you fill in the back first,
the current one will be delayed.
On the first day, do not generate images yet.
We will proceed with a single fixed image,
aiming for a 7-day goal.
Daily work is limited to 1 hour.
We will divide it into four parts:
images, video, sound, and posting.
In this article,
I will explain in order
what you should start with
to create your first video.
I wrote this because I wanted to shorten
the nights of those who have come to a standstill.
I will not discuss sales here.
All I will provide is
the sequence to follow until you post.
Once you master this,
you will spend fewer nights just watching.
As you get used to this sequence,
you will be able to confirm your own subject matter
before looking for new learning materials.
By the second day, there are only
three things you need to write down on paper.
A short subject, the name of the AI to create images,
and the place to open it.
The genre is AI animation from the start.
On the first day, decide on your subject
and check the candidates for image generation AI.
On the second day, decide on one image generation AI to use,
and confirm where to open it.
If there is even one blank space,
fill in that field before proceeding.
Even if you have written all three, do not press generate yet.
The time to press it is the night you produce that one fixed image.
The reason things don’t go well
is not a lack of talent.
It is because the generate button
is pressed before the subject is decided.
If you produce something while the subject is still blank,
you will be left with images you cannot explain.
You cannot use an image you cannot explain
the next night.
Another reason is adding more tools.
If you start listing
multiple AI image generation candidates,
you will spend all your time just choosing tools.
Do not change your AI image generator
until you finish your first video.
For the video,
anything that can import those images is fine.
The time spent comparing is more of a burden.
The moment you start searching,
tonight’s video gets pushed back.
The moment you watch a sample video,
your own subject matter will get swapped out.
That is why you should write one line on paper first.
If you create images based on the subject written on paper,
you can continue working
using those same images the next day.
Even if there is something about the image that bothers you,
there is no need
to try and fix everything at once.
Specify only the one thing
that bothers you the most.
If the fingers are distorted,
write ‘make the fingers five natural fingers’.
Do not post it while it is still significantly distorted.
Finish your first video without sound.
Removing audio is part of the main production steps.
What is important is
writing down what to do on paper,
and proceeding in order.
The detailed steps are provided further ahead.
First, I will introduce only the workflow.
Decide on your settings before you start moving.
Finish it as a silent video,
and aim to post it.
The view you are aiming for on the 7th day is this.
You have opened the published video and it is ready to be played.
The position of your profile display does not matter.
Once you have reached that point, you can play it with your own finger.
The speed of progress will vary depending on the generation results.
I do not promise whether you will receive comments or not.
I also do not promise any notifications about money.
The goal of this article is to get you to the point of posting your first video.
The 7 days are just a guideline, and the time required will vary depending on your production environment and generation results.
Once you understand the flow of creating your first video, you can proceed with the next one in the same order.
Even if you cannot complete a video with movement this time, you can apply the experience to your next production.
Before looking for new learning materials, you should be able to think about trying to make it yourself first.
“Don’t you need long prompts to make AI anime?”
Some people might think that.
For the first image, you add an art style to the subject.
Specifying something like “anime style” is enough.
I will not increase the number of detailed conditions more than necessary.
If you increase them, it becomes difficult to keep things consistent.
What should I do if the movement of the video doesn’t go well?
Some people might think that.
If the shape does not stabilize after two attempts,
make the movement even smaller,
and consider a third attempt.
However, video generation is limited to
a total of three attempts, including failures.
If no usable video remains after three attempts,
end production for that subject.
Switching to a short video of a still image is
an option, but
in this verification, I have not
confirmed it through to completion.
An example of an editing app is CapCut.
Load the image, set the
display duration, and save as a video.
However, in this verification,
it stopped at loading the material,
and I could not confirm the export process.
The method I was actually able to confirm to completion
is finishing Kling videos
using FFmpeg.
Some of you may have thought
that doing it all in one hour is impossible.
Do not cram everything into one day.
Spread it over 7 days, and progress only 1 hour per day.
If you are a fast learner, you may combine the first two days
into the same evening.
If there is a day you cannot do it,
you do not need to catch up.
The content of this article is 5 chapters.
Chapter 0 is the order of addition.
Decide on the subject and the final screen,
and check the candidates for the image generation AI to use.
Deciding on one AI to use
is for the second day.
The generation button comes after that.
A quick reference table for the 7 days is also here.
Chapter 1 is to settle on one subject for tonight.
If you can tell what the video is at a glance,
you pass.
Do not worry about matching the number of nouns.
Use only one AI for images and
one place to open it.
Chapter 2 covers how to create your first video by sticking to one method.
I will provide two examples:
one showing only hands and one showing a face.
Both include a set of instructions for the image
and instructions for the video.
Finish your first video without sound.
Chapter 3 introduces the steps to create a ‘post-ready’ version, check it, and upload it.
Check for any major distortions in the face,
hands, or the shape of objects being held.
Focus on just one minor improvement.
Check the vertical aspect ratio.
Also, check the file name and text before hitting post.
Check the video length supported by the platform
before exporting.
In this case, we will use a video that is about 3 seconds long.
If the length does not meet the requirements,
do not force a post;
consider a different platform.
Do not add any new cuts.
Chapter 4 is a schedule to follow before you start working.
You do not need to wait until Chapter 3 is finished.
You can return to the current day even while in the middle of production.
Follow the detailed steps in order starting from Chapter 1.
Proceed with the actual work while
looking at the quick reference guide in Chapter 0.
On Day 1 of the quick reference guide, you will not generate anything.
By Day 2, your subject, name, and
app will be written down on paper.
The single image from Day 3 will serve as your benchmark for everything that follows.
From Day 4 onwards, you will not deviate from that one image.
The back of the paper remains blank while you work on your first video.
You will write the subject for your second video on the back
only after you have posted the first one.
However, if you have tried the same subject three times in total
and finished without any usable footage,
you may move on to the next subject
even before posting.
Do not write the entire creation process in your post caption.
A single line about the subject is sufficient.
Do not mention that you made it
using only your smartphone.
If you are asked how you made it after posting,
simply reply briefly:
I animated it from a fixed image.
Before you start exporting, check the orientation and length.
If it is a short vertical video,
fit it to a vertical frame.
Your initial settings
are not always correct.
In AI anime production,
the more you research tools and methods,
the more confused you may become about where to start.
In this article,
I have narrowed down the necessary tasks for your first video
to four steps.
I have actually created one AI anime video to verify this.
This time, I used the Japanese instructions in this article
to verify the production of an AI anime video.
For image generation,
I used Bing Image Creator.
I animated the generated still image using Kling
to create a video of approximately 3 seconds.
Finally, I used the free tool FFmpeg to
finish it as a silent 9:16 vertical video.
The FFmpeg commands and steps used to finish
this video as a silent 9:16 MP4
are written in the main text.
Note that the FFmpeg editing procedure
verified here is for Windows PCs.
If you want to complete the process
using only a smartphone,
please check this point before purchasing.
I have not verified that the same steps
can be performed
using only a smartphone.
The original video used to verify the finish
with the posted FFmpeg conversion command
was 776x1164px with an SAR of 1:1.
If the conditions are different or
if you cannot confirm the SAR,
the procedure is designed to stop the work.
Adjustment methods for other conditions
are not covered in this book.
The finished MP4 is 720x1280px, and
I confirmed that it plays normally.
The additional cost for this project was 0 yen.
However, I did consume 30 credits
that I already held in Kling.
Note that image generation in Midjourney,
video exporting in CapCut, and
posting to social media
were neither performed nor completed in this verification.
In this article, I will introduce
the verified procedures and
the unverified parts separately.
This article costs 3,000 yen.
What you get for 3,000 yen is not a volume of books,
but the three components needed for your first video.
The first is the sequence of tasks for 7 days.
There are things to do and things not to do
for each day.
The second is two sets of prompt examples.
For both hands and faces, there is a set
of image prompts and video prompts.
The third is practice for when you get stuck.
If the movement does not stabilize after 3 attempts,
you stop regenerating.
Short videos using still images are an option,
but I have not verified that process to completion this time.
It also includes how to divide where to look.
I check for major distortions and
narrow down the fine improvements to one point.
Images of the operation screen and
the completed files themselves are not included.
The confirmed steps and numbers
are written above.
Just reading the materials
uses up the 1 hour
you were supposed to spend working.
You generated videos many times, but
only your credits decreased, and
in the end, you couldn’t post a single one.
Have you ever had an experience like that❓
To ensure you don’t repeat the same thing next week,
let’s start moving toward your first post
starting today.
It doesn’t necessarily mean you will finish in 7 days.
The goal is to reach the point of posting.
Some of you might have thought,
『Won’t this just add more explanations❓』
I won’t change the AI for images until the first video.
The order remains the same four steps.
Some of you might have thought
that you can’t draw.
There is no need to draw pictures yourself.
You don’t need to show your face or use your voice either.
There are people for whom this article is not a good fit.
People who only want notifications of sales.
Those whose goal is to search for or
compare new AI tools.
If you are one of those people,
please close this screen.
7 days, 1 hour a day.
For those who want to finally
post their first video.
For AI tools,
start by trying out
the free-to-use features.
If there are fees for
generating or exporting images and videos,
check the cost
before deciding whether to use them.
Tonight’s step is just one thing.
Write down your subject on a piece of paper in one line.
It just needs to be long enough
to understand what the video is at a glance.
Once you’ve written it,
close the screen with the new tutorial.
If you were able to close the tutorial screen,
that alone is your step for today.
A postscript.
I wanted to help those who have tried many tutorials
but haven’t been able to create a single video.
I wrote this article because I want you to turn the time
you spent just reading tutorials
into time spent creating your first video.